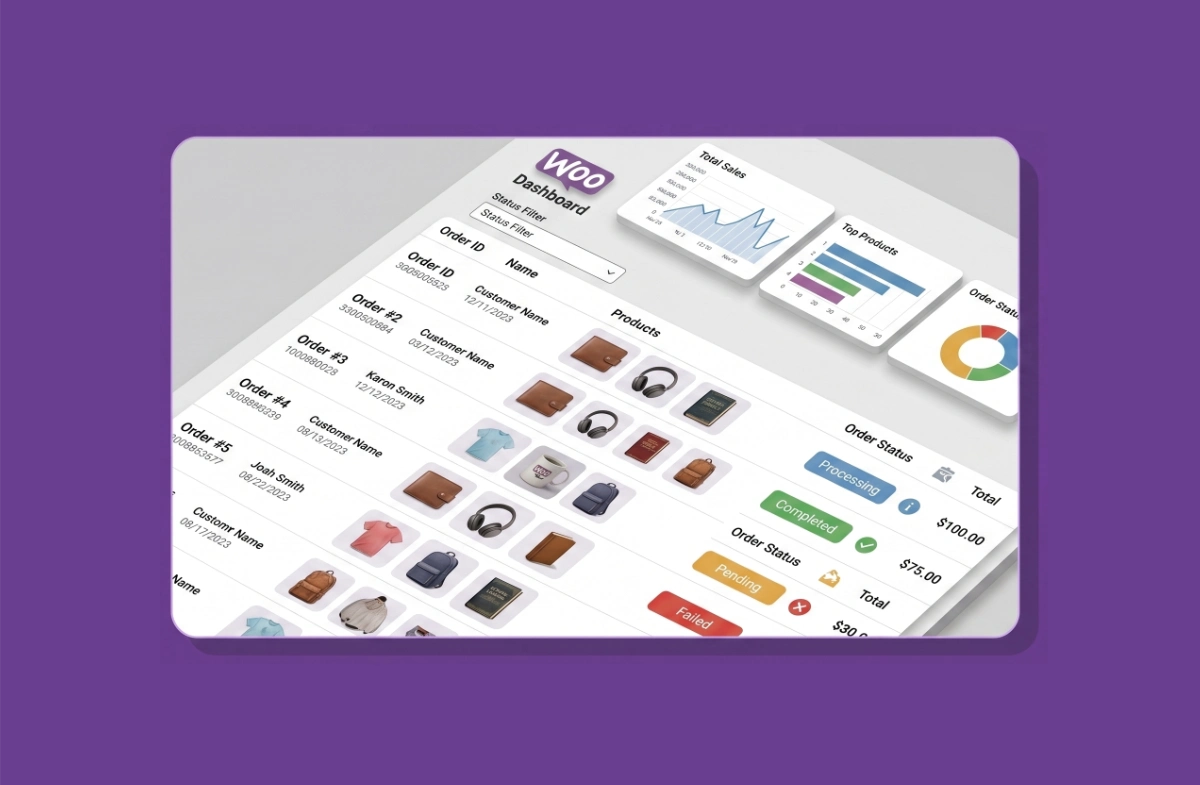
Learning how to manage orders in WooCommerce is essential if you run an online store — it ensures every order reaches your customers safely and on time. WooCommerce as a WordPress e-commerce plugin provides a fairly complete set of tools for order management. With these built-in features, you can add, edit, delete, and change order statuses with ease.
In this article, we’ll walk through every step of how to manage orders in WooCommerce in detail — from viewing the order list to changing order statuses and adding notes. Let’s get started.
Understanding Order Statuses in WooCommerce
Before you can effectively manage orders in WooCommerce, you need to understand the different statuses that can be applied to each order. An order status is a label assigned to an order to distinguish where it currently stands in the fulfillment process.
WooCommerce provides several order statuses to help you monitor how far along each order has been processed. Knowing these statuses is the foundation of managing orders in WooCommerce correctly:
- Processing — The order has been received and payment has been confirmed, but the order is still being prepared. Use this status while the order is being packed.
- Pending Payment — The order has been placed but payment has not yet been received. This status is usually assigned automatically by the payment gateway system.
- On Hold — The order has been placed, but the customer has not yet confirmed their payment.
- Completed — The order has been processed and delivered to the customer.
- Cancelled — The order has been cancelled by the customer or the system.
- Refunded — The order has been cancelled and returned to the store. The customer will receive a refund.
- Failed — The order has failed, usually because the customer did not complete the payment.
If your store requires a custom order status — such as a “Shipped” status — you can use the Custom Order Status for WooCommerce plugin to add and manage custom statuses directly from your WordPress dashboard.
How to Manage Orders in WooCommerce
Viewing the Order List
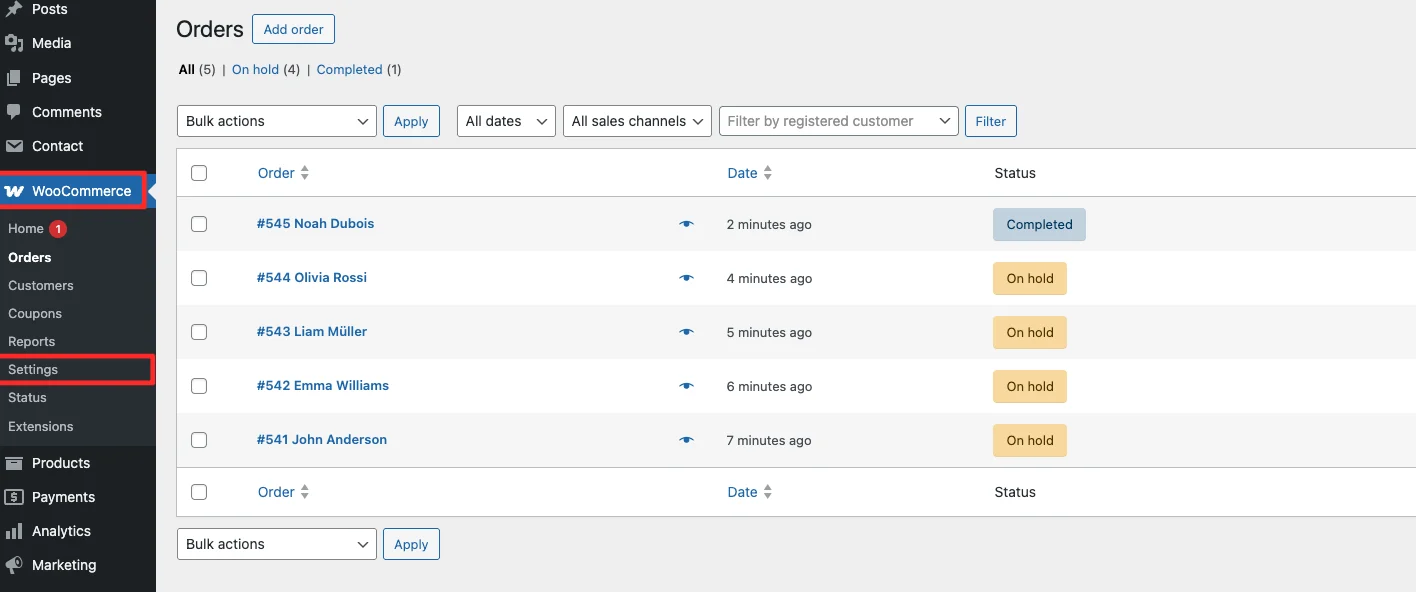
The first step to manage orders in WooCommerce is knowing where to find them. Go to your WordPress admin dashboard and navigate to WooCommerce → Orders.
From this orders page, you can view all orders, search for specific orders, and change the status of any order. This is the central hub you’ll use every time you need to manage orders in WooCommerce.
Searching for an Order
To search for a specific order, open the orders page at WooCommerce → Orders, then use the search field in the top right corner. Enter a customer email address, order ID, or customer name to find the order you’re looking for.

Viewing the Order Summary
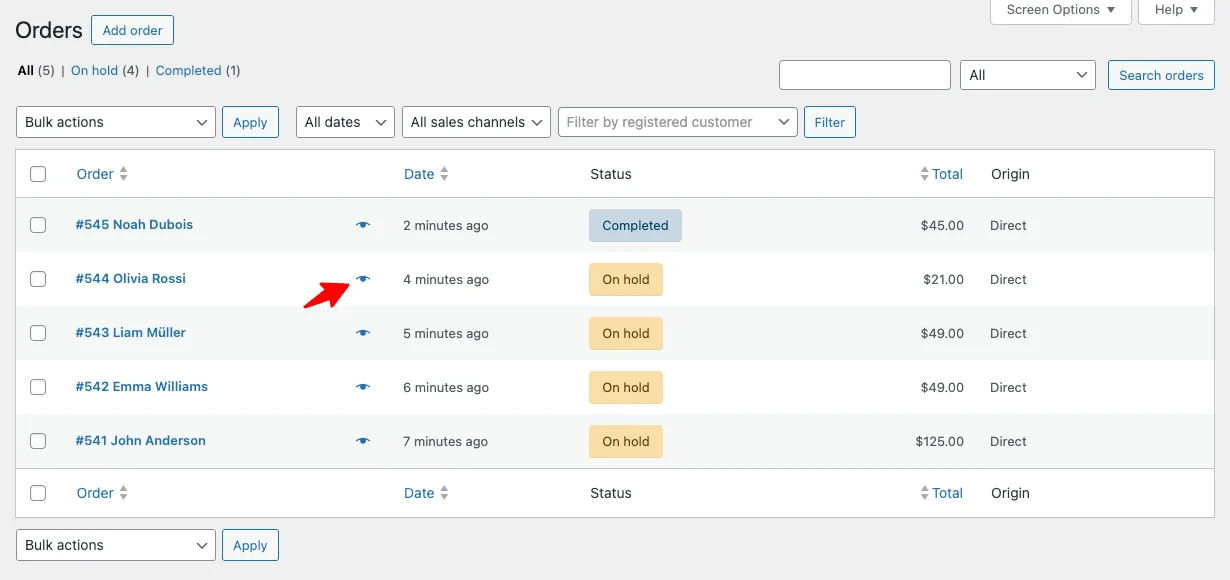
To view a quick order summary, click the eye icon on any order in the WooCommerce → Orders page. The summary panel contains key information such as the customer’s details, shipping address, and the items ordered.
In addition to showing order details, this panel also includes a button to change the order status to Completed. The order summary feature is particularly useful when you need to manage orders in WooCommerce quickly without opening the full detail page.
Viewing Order Details
The order detail page provides a complete view of all information related to a single order — including customer data, shipping address, and purchased products. It also offers the most comprehensive set of tools to manage orders in WooCommerce.
To open the order detail page, click the order number or customer name in the Order column on the WooCommerce → Orders page. From here, you can edit the order, change the shipping address, add notes, and even add new products to an existing order.
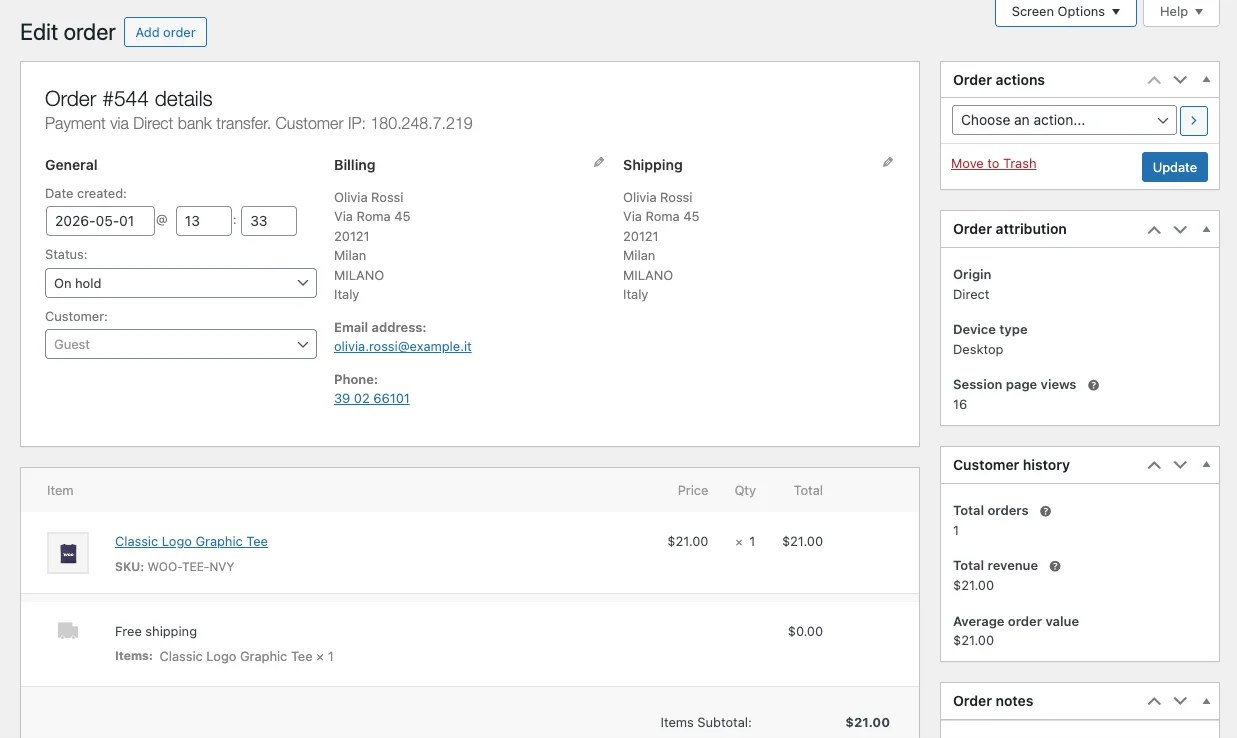
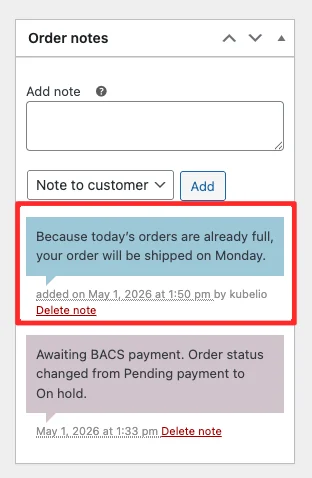
Adding Notes to an Order
Order notes are one of the most useful tools when you manage orders in WooCommerce. They allow you to add supplementary information to a transaction and can be used to record any action taken on an order — such as a payment confirmation, a stock reduction, or a message sent to the customer via email.
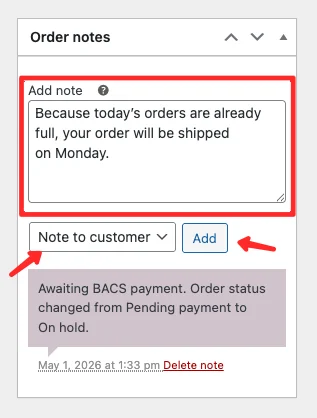
Order notes in WooCommerce come in three types, each with a different purpose:
1. System Notes
System notes are created automatically by WooCommerce — for example, when an order status changes during checkout. These notes are marked with a purple color.
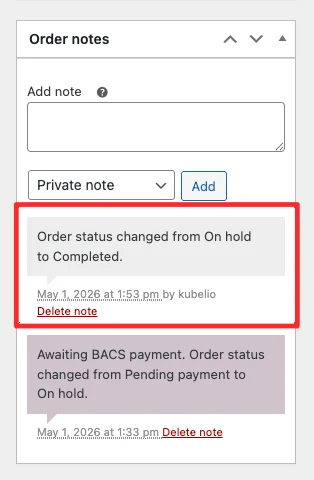
2. Private Admin Notes
Private notes are created by the store admin, such as internal status changes or private reminders. These notes are only visible to the admin and are marked with a grey color.

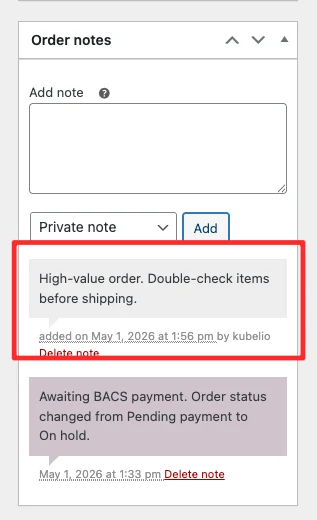
3. Customer Notes
Customer notes are messages sent directly to the customer. When this type of note is created, WooCommerce automatically sends an email notification to the customer and the note is also displayed in the customer’s member area. These notes are marked with a blue color.
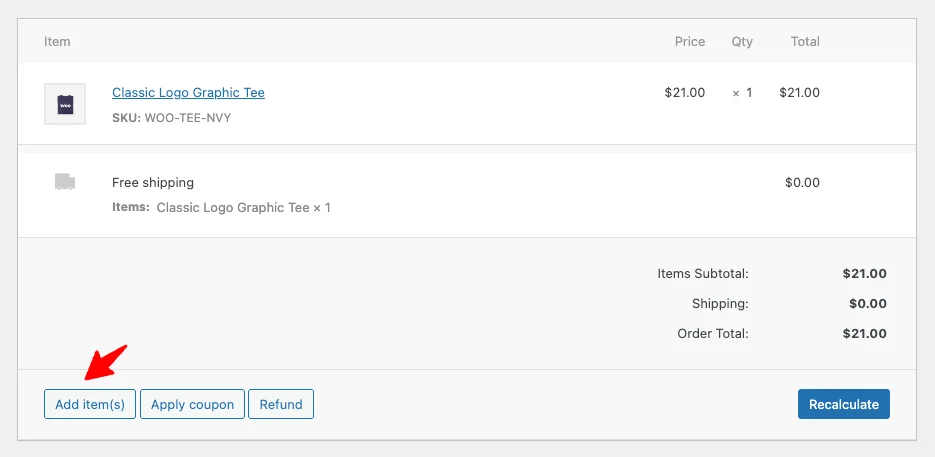
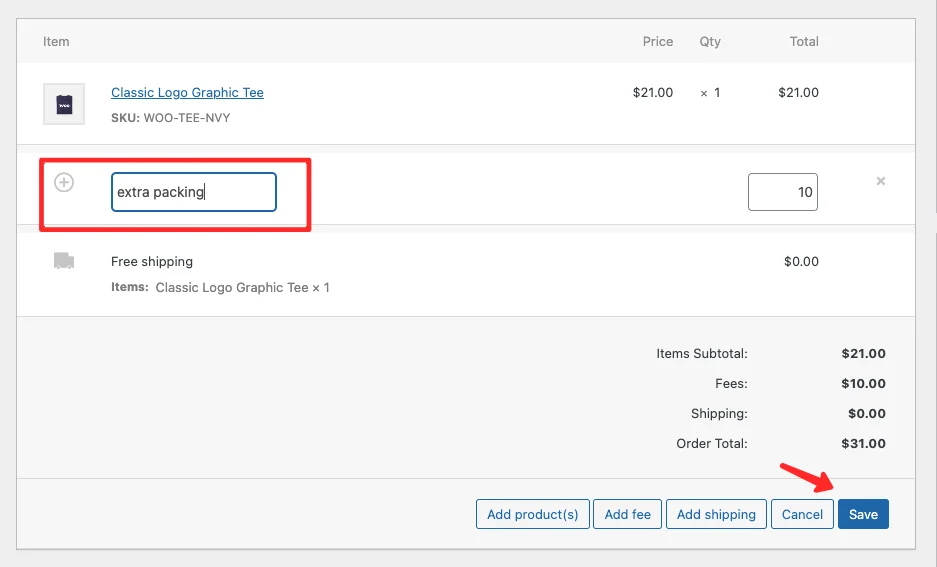
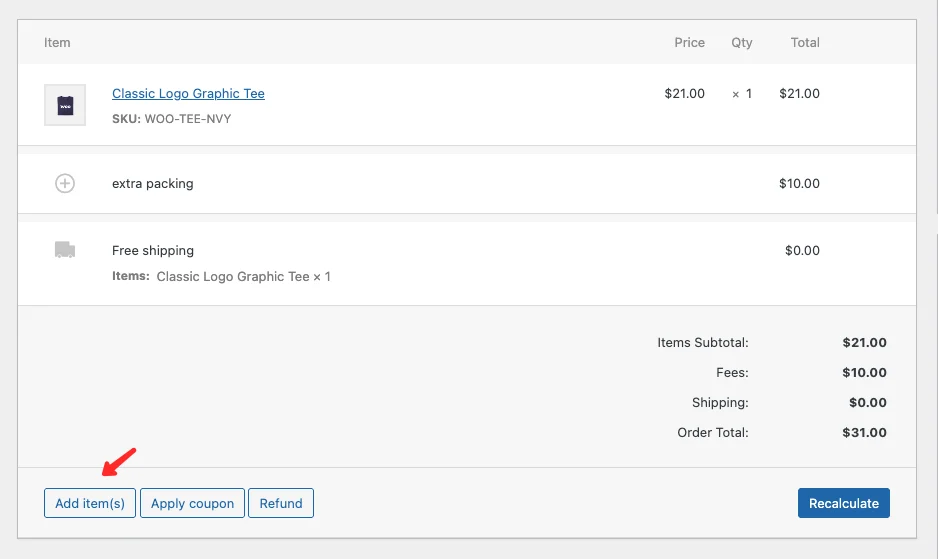
Adding Extra Fees to an Order
To add an extra fee to an existing order in WooCommerce, follow these steps. This is a handy feature when you need to manage orders in WooCommerce that require additional charges such as handling fees or late payment surcharges:
- From the admin dashboard, navigate to WooCommerce → Orders.
- Click the order ID in the Order column.
- On the order detail page, locate the Items section.
- Click Add Item(s) → Add fee.
- In the popup, enter the additional fee amount as a fixed price or a percentage.
- Click OK.
Note: Extra fees can only be added when the order status is On Hold or Pending.

To rename the fee label:
- Click the pencil icon next to the newly added fee in the order total.
- Enter a new label name for the fee.
- Click Save to apply the changes.

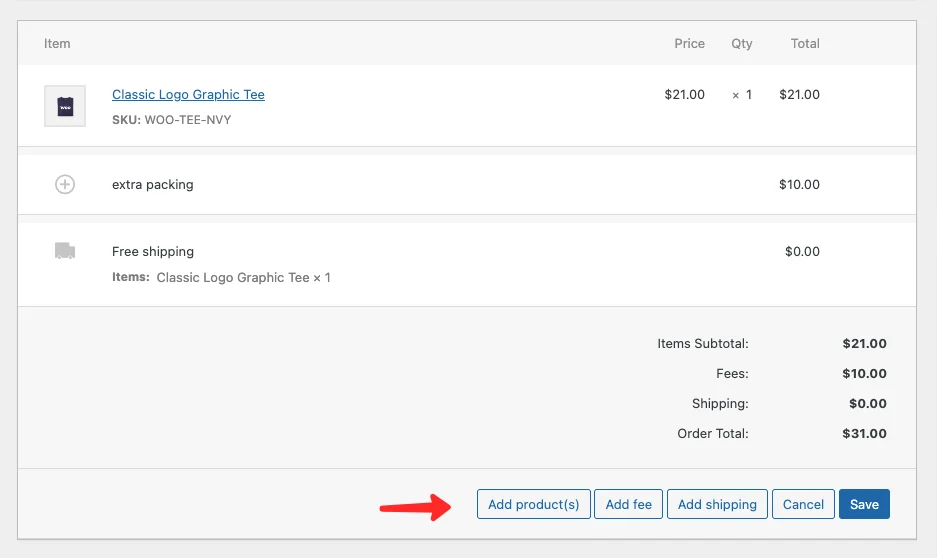
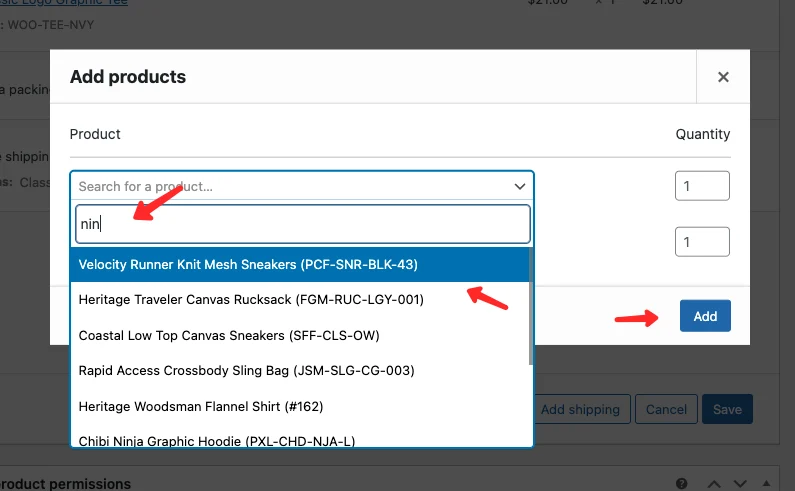
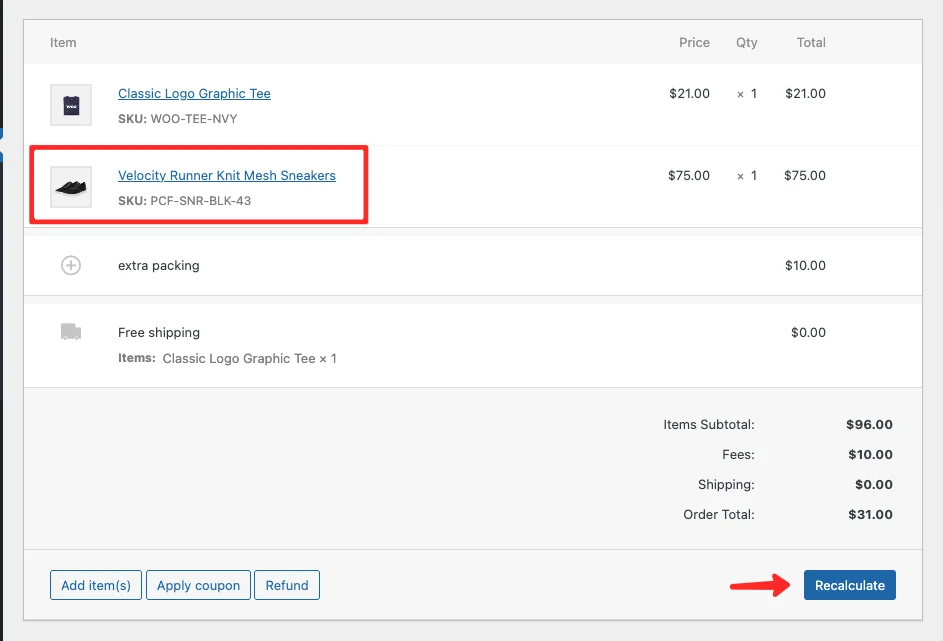
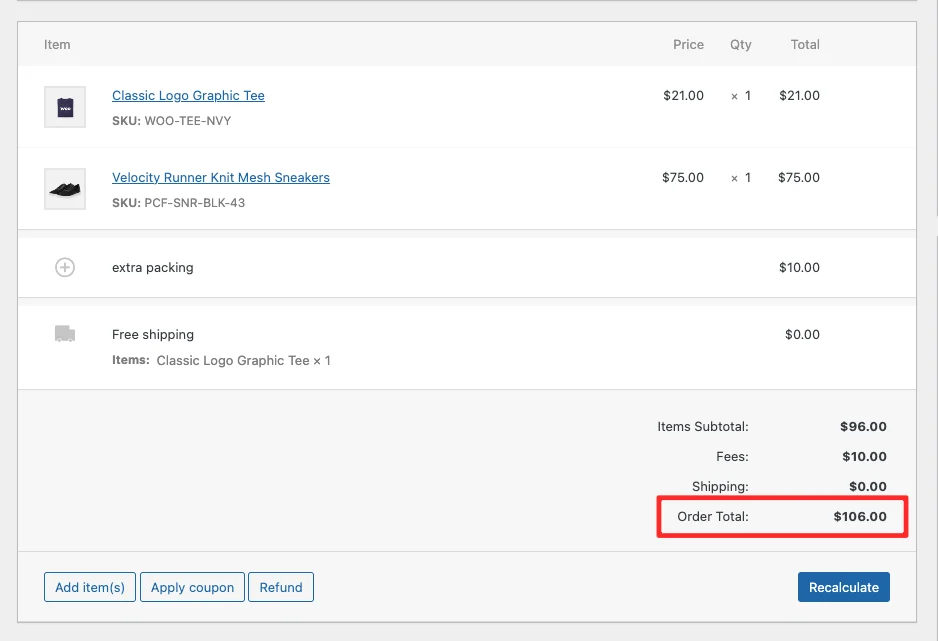
Adding a New Product to an Order
Another useful feature when you manage orders in WooCommerce is the ability to add a new product to an existing order. To do this, follow these steps:
- From the admin dashboard, navigate to WooCommerce → Orders.
- Click the order ID in the Order column.
- On the order detail page, locate the Items section.
- Click Add Item(s) → Add Product(s).
- In the Add Product popup, type the name of the product you want to add.
- Select the product from the results, then click Add.
Note: New products can only be added when the order status is On Hold or Pending.
Changing the Order Status
Changing the order status is one of the most frequent actions you’ll take when you manage orders in WooCommerce. As covered earlier, WooCommerce provides several order statuses and each one serves a specific purpose. If you missed that section, scroll back up to Understanding Order Statuses in WooCommerce.
In WooCommerce, you can manage orders and change their status in three different ways:
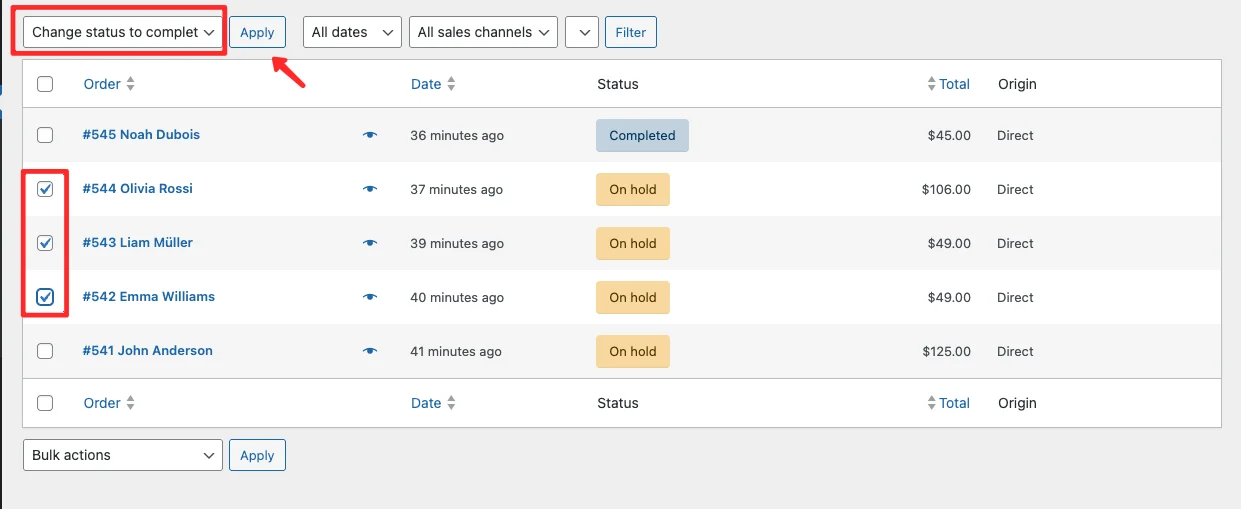
1. Bulk Change Order Status from the Orders Page
To change the status of multiple orders at once in WooCommerce:
- From the admin dashboard, navigate to WooCommerce → Orders.
- Check the orders you want to update.
- Click the Bulk Action dropdown and select the new order status.
- Click Apply.
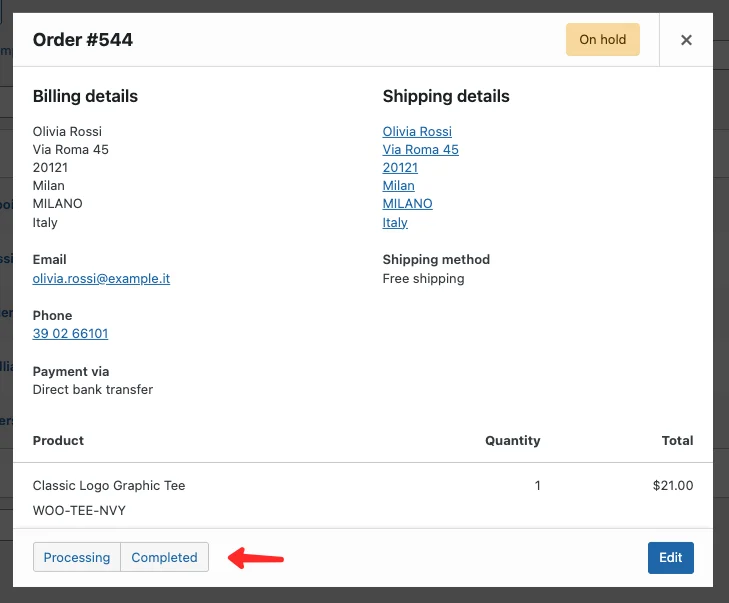
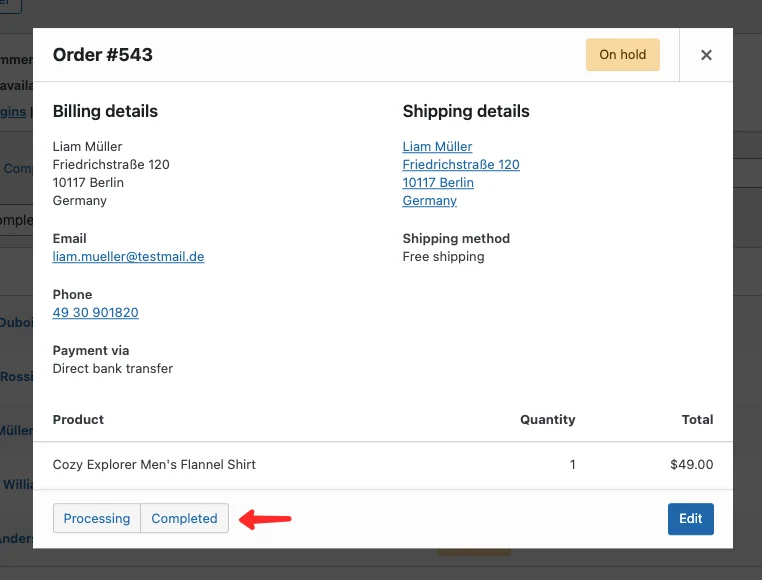
2. Change Order Status from the Summary Popup
To quickly change an order status directly from the summary popup in WooCommerce:
- From the admin dashboard, navigate to WooCommerce → Orders.
- Click the eye icon on the order you want to update.
- In the order summary popup, click the Completed button.
Note: From the summary popup, you can only change the order status from On Hold to Completed or Processing. For any other status, click Edit to open the full order detail page.
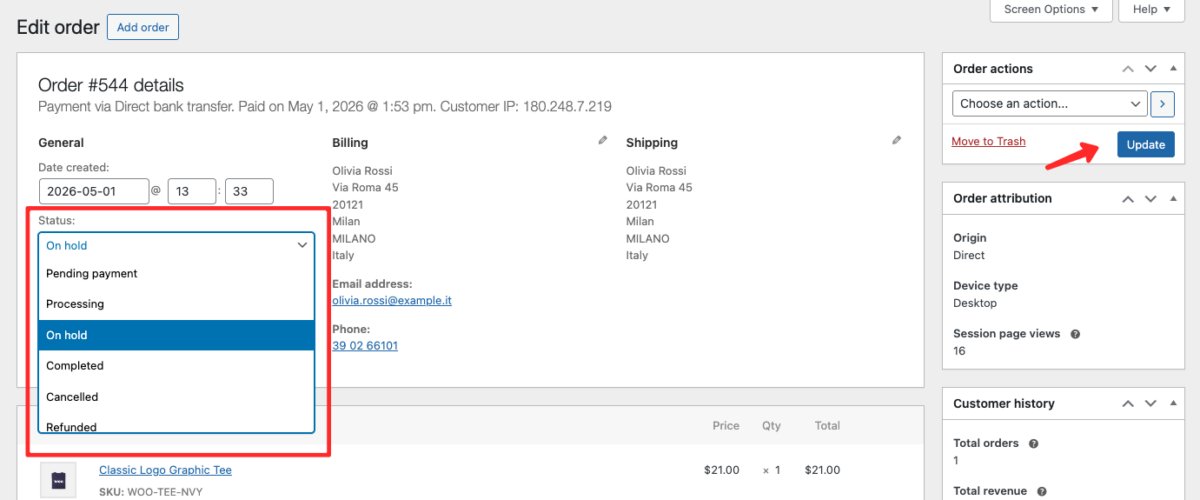
3. Change Order Status from the Order Detail Page
To change the order status from the full order detail page in WooCommerce:
- From the admin dashboard, navigate to WooCommerce → Orders.
- Click the order ID in the Order column.
- In the Status dropdown, select the new status you want to apply.
- Click Update to save the changes.
Product Stock Status When an Order is Placed
Understanding how stock behaves is important when you manage orders in WooCommerce. When a customer places an order, WooCommerce automatically reduces the available stock for the ordered products. Stock is reduced even if the customer has not yet completed the payment.
Stock will be restored automatically when the order status is changed to Cancelled, Failed, or Refunded. Keep this in mind when managing orders in WooCommerce to avoid stock discrepancies in your store.
Frequently Asked Questions
Pending Payment means the order has been received but the customer has not yet completed the payment. This status is usually assigned automatically by the payment gateway system when the customer initiates a checkout but does not complete the transaction. When you manage orders in WooCommerce, this is one of the statuses you’ll encounter most often.
To ship a product, you need to hand the package over to a courier service or drop it off at the relevant shipping office. Once the package has been handed to the courier, you can change the order status to Completed to notify the customer.
For COD orders, you need to use a shipping or delivery service that supports cash-on-delivery payment. See the tutorial: How to Add a COD Payment Method in WooCommerce.
By default, WooCommerce does not have a dedicated Shipped status. The standard practice is to change the order status to Completed once the package has been dispatched. However, if your store needs a custom “Shipped” status, you can use the Custom Order Status for WooCommerce plugin to create one.
Yes. When you manage orders in WooCommerce, you can edit orders that are in On Hold or Pending status. From the order detail page, you can update customer information, change the shipping address, add or remove products, and add extra fees. Orders in Processing or Completed status have limited editing options.
Yes. WooCommerce automatically sends email notifications to customers when certain order status changes occur — such as when an order moves from Processing to Completed. You can also manually send a note to the customer using the customer note feature on the order detail page.
Conclusion
Now that you know how to manage orders in WooCommerce, you have everything you need to keep your store running smoothly. WooCommerce provides a comprehensive set of tools for managing orders — from viewing the order list and adding notes to changing statuses and adding fees. With these features, you can monitor every order from the moment a customer places it on the checkout page all the way through to successful delivery.
When you manage orders in WooCommerce regularly, you’ll also benefit from the built-in email notification system. Whenever an order status changes, both you and your customer will receive an email update — making it easy for customers to track the progress of their purchase at every stage.
For complete documentation on how to manage orders in WooCommerce, refer to the official WooCommerce guide: Managing Orders.
Looking for a WooCommerce Theme Built for Speed?
Kubelio is a lightweight WordPress + WooCommerce theme designed to help you run your online store more efficiently — with a clean admin experience, fast page loads, and a checkout flow optimized for conversions.

Comments