Selling digital products is a promising business choice today. However, running a digital product business online requires the right e-commerce platform — one that can reliably deliver product access to customers.
One plugin you can use to sell digital products on WordPress is WooCommerce. With this plugin, you can add digital products, send download links, and restrict file access only to customers who have made a purchase.
Read also: How to Add Products in WooCommerce
In this tutorial, we’ll walk through step by step how to add digital products in WooCommerce effectively and easily on your online store. Let’s dive in!
What Are Digital Products in WooCommerce?
Before we begin, let’s talk about what digital products actually are. A digital product is any product delivered in electronic format — such as ebooks, music, video, and software. These products can be downloaded or accessed directly from the internet, without any physical shipping required.
When you add digital products in WooCommerce, you’re essentially creating items that customers can purchase and instantly receive via a secure download link — no packaging, no shipping, no inventory to manage.
Common examples of digital products include:
- Ebooks and PDF guides — Educational content, manuals, or reference materials
- Online courses and video tutorials — Pre-recorded lessons or training materials
- Music and audio files — Tracks, sound effects, or podcast episodes
- Design assets — Templates, fonts, icons, stock photos, Photoshop files
- Software and applications — Plugins, themes, scripts, or tools
- Photography and digital art — Printable artwork or stock photography
How to Add Digital Products in WooCommerce
Here is a complete step-by-step guide on how to add digital products in WooCommerce:
Step 1: Fill in the Digital Product Information
Adding digital products in WooCommerce starts the same way as adding any regular product. Go to your WordPress dashboard and navigate to Products → Add New.
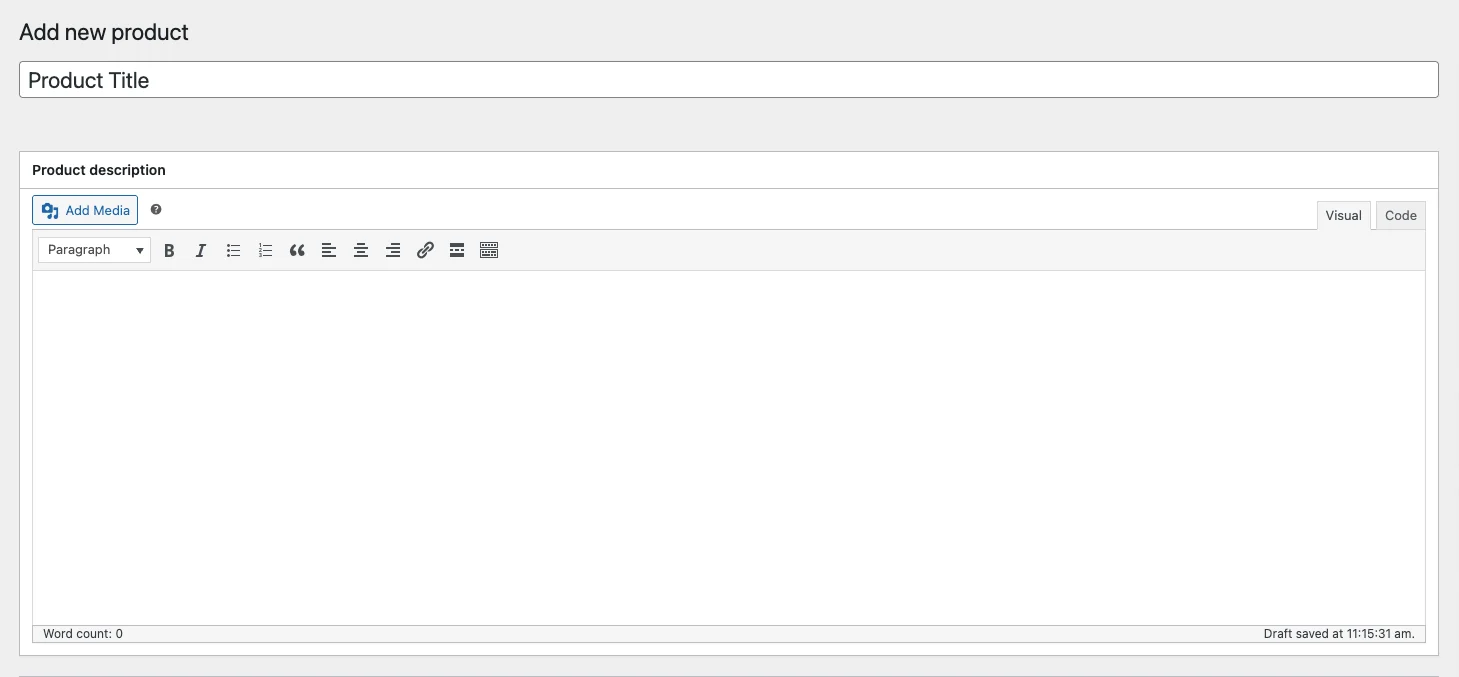
Fill in the product information such as the product name, product description, and price. Select a product category and upload a product image.
Make sure your product description clearly communicates what the buyer will receive after purchase — including file format, file size (if relevant), and any usage terms. This is especially important when you add digital products in WooCommerce, since customers cannot inspect the item physically before buying.
Step 2: Configure the Digital Product Type Settings
In the Product Data section, check both the Virtual and Downloadable options. These two checkboxes are what define a WooCommerce item as a digital product. After doing so, enter the price and any other required details.
Here is what each option means:
- Virtual — The product does not require a shipping method. No address fields will be shown at checkout.
- Downloadable — Check this to display the file download options and allow WooCommerce to deliver the digital product to customers automatically.
- Download Limit — Limits how many times a customer can re-download the file. For example, you can set it so customers can only download the file 5 times.
- Download Expiry — Limits how long a customer can access the purchased file. For example, customers can only access the file for 30 days after purchase.
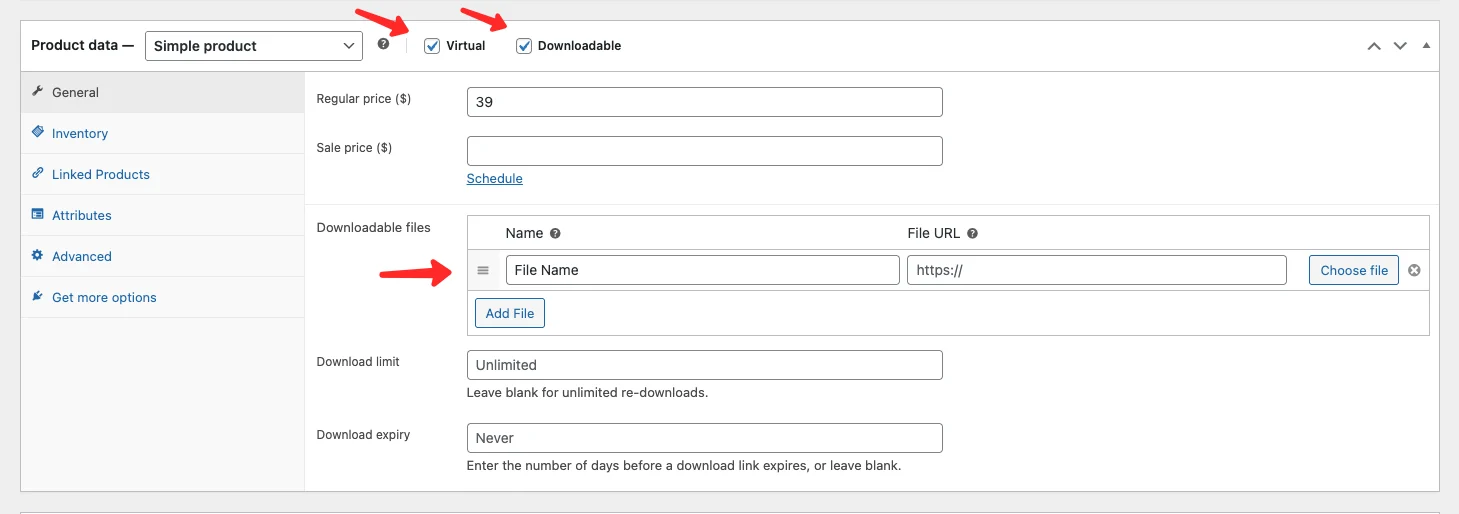
To upload your digital file, click Add file and either upload directly from your computer or paste a link from a cloud service such as Google Drive or Dropbox.
Important — File Security Recommendation:
For better file security, it is strongly recommended to store your digital files on the same server as your website rather than using external cloud services. Here’s why:
- Files stored on your own server are protected by WooCommerce’s download authentication system. Only customers who have completed a purchase will receive a unique, time-limited download link. Anyone without a valid purchase cannot access the file.
- Files stored on external services like Google Drive or Dropbox use public-facing links by default. This means anyone who has the link can access and download the file — regardless of whether they made a purchase. There is a real risk that a customer who legitimately purchased your product shares the download link publicly, allowing others to get your digital product for free.
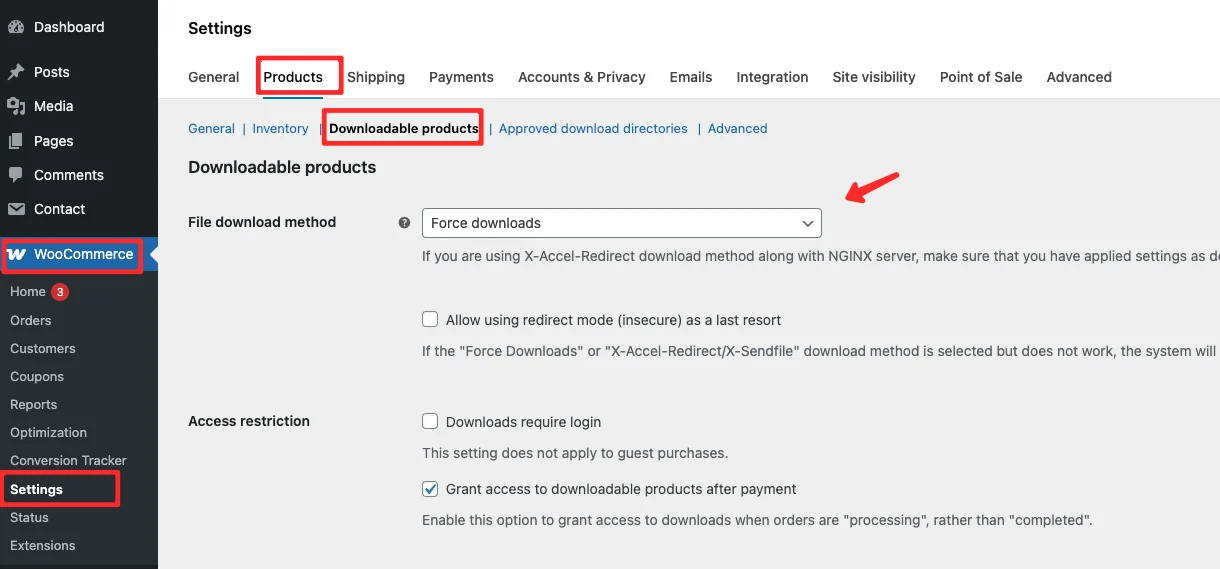
If you still prefer to use an external server for storage (for example, to save hosting disk space), make sure to adjust the download method by going to WooCommerce → Settings → Products → Downloadable Products, then select the Redirect only (insecure) option. Keep in mind that this method cannot fully prevent link sharing.
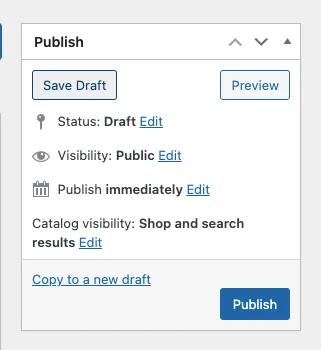
Step 3: Publish Your Digital Product in WooCommerce
Once you’ve completed all the steps above, review all the information you’ve entered, then click the Publish button to add the digital product to your WooCommerce store.
Your digital product is now live and ready for customers to purchase and download.
Digital Product Purchase Flow in WooCommerce
Understanding the purchase flow helps you set up your WooCommerce digital products store correctly from the start. The flow varies depending on the payment method used.
If you use an automatic payment gateway such as PayPal or Stripe:
- Customer completes the checkout and payment process on your WooCommerce store.
- The product download link is automatically sent to the customer’s email and becomes available in their member area — no admin action required.
If you use manual bank transfer:
- Customer completes the checkout process on your WooCommerce store.
- Customer sends payment confirmation to the store admin.
- Admin changes the order status to Complete.
- The product download link is automatically sent to the customer’s email and becomes available in their member area.
Using an automatic payment gateway is strongly recommended because it removes manual steps, speeds up delivery, and gives customers instant access to their purchased files.
Digital Product Email Example in WooCommerce
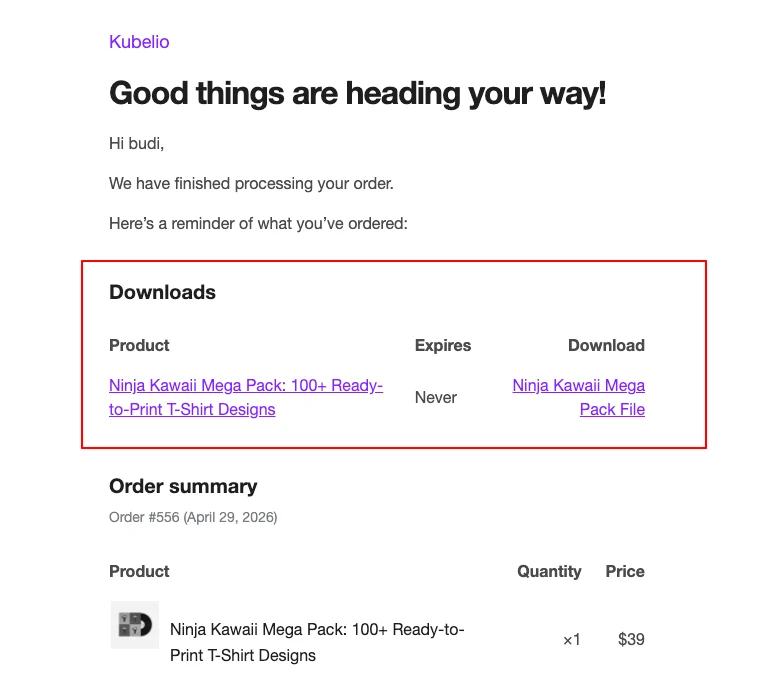
Below is an example of the email that customers receive after completing a purchase of a digital product in WooCommerce. The email contains the order details along with the product download link.
The email typically includes:
- Order number and purchase date
- List of purchased products
- Direct download button or link for each file
- Link to access the member area for future downloads
- Customer account login details (if auto-registration is enabled)
Customers can use this email to download their files immediately, or they can log into their member area to access all their past purchases at any time.
Tips for Selling Digital Products on WooCommerce
Here are some practical tips to help you maximize your WooCommerce digital product sales after you add digital products in WooCommerce:
- Disable unnecessary checkout fields — Remove address fields such as city, province, and postal code since digital products don’t require shipping.
- Only keep name and email fields — A streamlined checkout reduces friction and increases the likelihood of completed purchases.
- Store digital files on the same hosting server — This ensures download links are protected and only accessible by customers who have made a valid purchase. Using an external service like Dropbox can save hosting space, but it carries a significant risk: customers who purchased the file can share the link with others who haven’t paid.
- Set download limits and expiry dates — This protects your content and encourages customers to download promptly.
- Use a payment gateway like PayPal or Stripe — Automating payment processing means your store can operate 24/7 without you needing to manually confirm every transaction.
- Write clear product descriptions — Always mention the file format, file size, and what’s included so customers know exactly what they’re purchasing.
- Use high-quality product images — Even though the product is digital, a professional-looking cover image or mockup increases perceived value and conversion rates.
Frequently Asked Questions
No additional plugin is required. WooCommerce natively supports digital (virtual and downloadable) products. Simply check the Virtual and Downloadable options when adding a product, and you’re ready to go.
These are two separate options that can be used independently or together:
- Virtual removes all shipping-related fields from the checkout page
- Downloadable adds the file upload section and enables the download link system
For most digital products, you’ll want to check both options.
Yes. You can add multiple files to a single product by clicking the Add file button multiple times. All files will be available to the customer after purchase.
The safest option is to store files directly on your hosting server, because WooCommerce will protect the download links behind authentication. Storing on external services like Google Drive or Dropbox is possible but risky — customers can potentially share the download link with others.
Yes. You can update the file in the product settings at any time. Customers who already purchased the product will receive access to the updated file when they use their existing download link, depending on whether the link has expired.
In two ways:
- Automated email — A download link is sent to the customer’s email immediately after a successful payment
- Member area — If auto-registration is enabled, the customer can log into their account and access all purchased downloads from their dashboard
Yes. Simply set the product price to 0 or leave it empty. Customers can then “purchase” the product for free and receive the download link without any payment required. This is useful for lead magnets or free samples.
Once the limit is reached, the download link will no longer work. As the store admin, you can manually reset the download count from the order details page if the customer contacts you for assistance.
WooCommerce doesn’t have a built-in preview feature, but you can:
- Upload a sample file (e.g., a PDF preview chapter) as a separate free product
- Add a preview embed (e.g., a Google Drive preview link) in the product description
By default, WooCommerce applies the same download limit to all customers who purchase a product. For more granular control (such as VIP customers getting unlimited downloads), you would need a membership plugin like WooCommerce Memberships.
Conclusion
Adding digital products in WooCommerce is straightforward. The process is essentially the same as adding a regular product — the key difference is that you need to check the Virtual and Downloadable options to enable file download functionality.
Key takeaways from this tutorial:
- Always mark digital products as both Virtual and Downloadable
- Set download limits and expiry dates to protect your content
- Store files on your own server for better access control
- Use an automatic payment gateway for a fully hands-off fulfillment process
- Keep your checkout page simple — name and email are all you really need
If you’re just getting started with a digital store on WooCommerce, consider using a theme that’s already optimized for digital product sales. A lightweight, well-structured theme will help you present your products professionally and give customers a smooth buying experience from start to finish.
For deeper configuration and advanced settings, refer to the official WooCommerce documentation:
- Digital/Downloadable Product Handling — covers file security, download methods, access restrictions, and troubleshooting
- Virtual and Downloadable Products — official guide on setting up virtual and downloadable product types in WooCommerce

Comments