If you sell products that come in different sizes, colors, or flavors, WooCommerce product variations are exactly what you need. Instead of creating a separate product listing for each option, variations let you manage everything under one product — keeping your store clean, organized, and easier to manage.
In this guide, you will learn what product variations are, the difference between global and local attributes, how to set everything up step by step, and how to use bulk editing to save time when your store grows.
What Are WooCommerce Product Variations?
Before diving in, it helps to understand two key terms:
- Product Attribute – A characteristic of your product, such as color, size, or material.
- Product Variation – A specific option within an attribute. For example, the color attribute might have variations like Red, Blue, and Green.
A product that uses these attributes and variations is called a Variable Product in WooCommerce.
Example: Imagine you sell a t-shirt with two attributes — color (Red, Green) and size (S, M, L). WooCommerce will generate 6 possible combinations:
- Red / S
- Red / M
- Red / L
- Green / S
- Green / M
- Green / L
Each combination is a unique variation with its own price, stock, and SKU.
Read our complete guide to adding products in WooCommerce first — it covers every field from pricing and inventory to shipping and images, so you will have a solid foundation before working with variations.
Global Attributes vs Local Attributes — What Is the Difference?
Before you start adding attributes to a product, it is worth understanding the two ways WooCommerce lets you create them. Choosing the right approach from the beginning will save you a lot of repetitive work later.
Global Attributes
Global attributes are created once at the store level and can then be reused across as many products as you like.
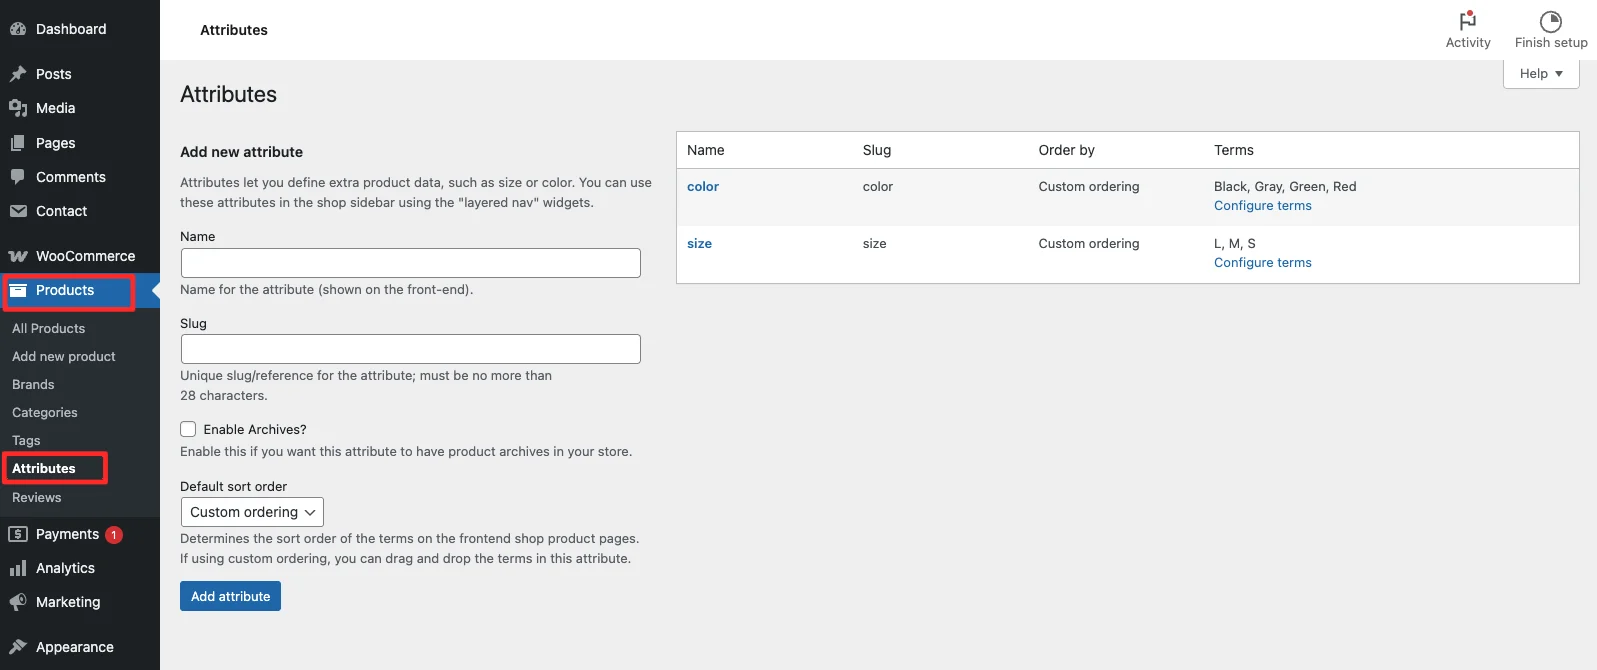
Where to create them: Go to Products > Attributes in your WordPress admin.
From this screen you can add a new attribute — for example, Size — and define all its terms: XS, S, M, L, XL. Once saved, this attribute is available to every product in your store.
When to use global attributes:
- When the same attribute applies to many products (e.g., Size and Color for an apparel store)
- When you want consistent naming across your entire catalog
- When you plan to use attributes as layered navigation filters on your shop page — only global attributes can be used in WooCommerce’s built-in filter widgets
How to assign a global attribute to a product:
- Open a product and scroll to the Product data section.
- Click the Attributes tab.
- Use the dropdown to select the global attribute you created (e.g., Size).
- Click Add.
- Select which values apply to this specific product.
- Check Used for variations and click Save attributes.
Local (Custom) Attributes
Local attributes — also called custom product attributes — exist only on the product where they are created. They are not saved to the store-wide attributes list and cannot be reused elsewhere.
Where to create them: Inside the product editor, on the Attributes tab, select Custom product attribute from the dropdown and click Add.
When to use local attributes:
- For one-off or highly specific options that apply to a single product only (e.g., Bundle Contents or Personalization Text)
- When you are testing a new attribute before deciding whether to make it global
- For product-specific options that do not need to appear in shop filters
Quick Comparison
| Global Attribute | Local Attribute | |
|---|---|---|
| Created in | Products > Attributes | Inside the product editor |
| Reusable across products | Yes | No |
| Works with shop filters | Yes | No |
| Best for | Color, Size, Material | One-off or unique options |
| Consistency across catalog | High | Low |
Recommendation: If you are building a store that sells multiple products with similar characteristics (e.g., clothing, electronics, accessories), create your core attributes — Color, Size, Material — as global attributes first. This keeps your catalog consistent and enables filter functionality out of the box.
How to Add Product Variations in WooCommerce
Step 1 — Set the Product Type to Variable Product
From your WordPress dashboard, go to Products > Add New.
Fill in the basic product details: title, description, category, featured image, and gallery images.
Then scroll down to the Product data section. Open the dropdown and select Variable product.

Note: When using variable products, you do not set a price or stock level at the top level. All pricing and inventory are managed at the variation level.
Step 2 — Add Product Attributes
Attributes define the choices a customer will see on your product page, such as size or color. You can use a global attribute you created earlier (recommended for common options like Size and Color) or create a custom product attribute that applies only to this product.
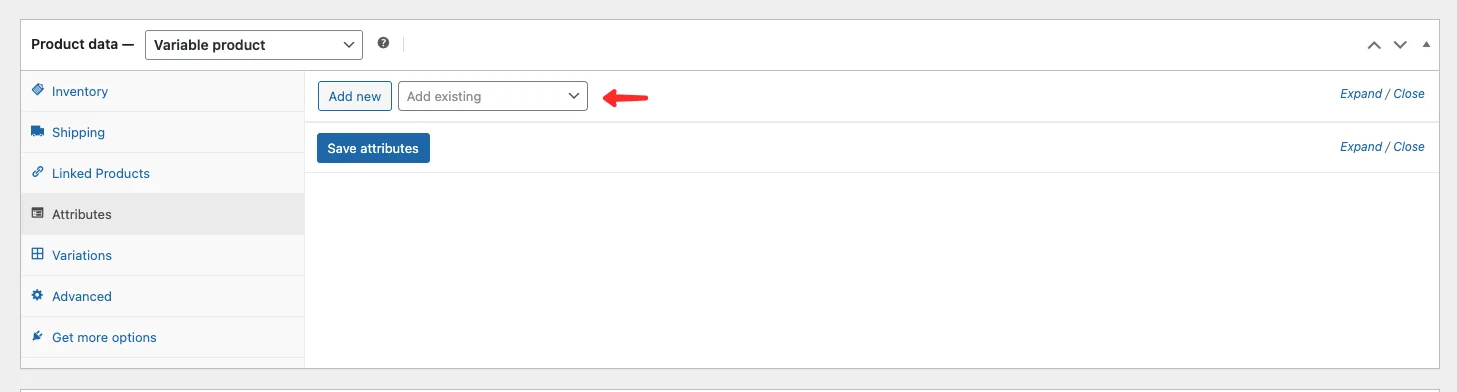
To add attributes:
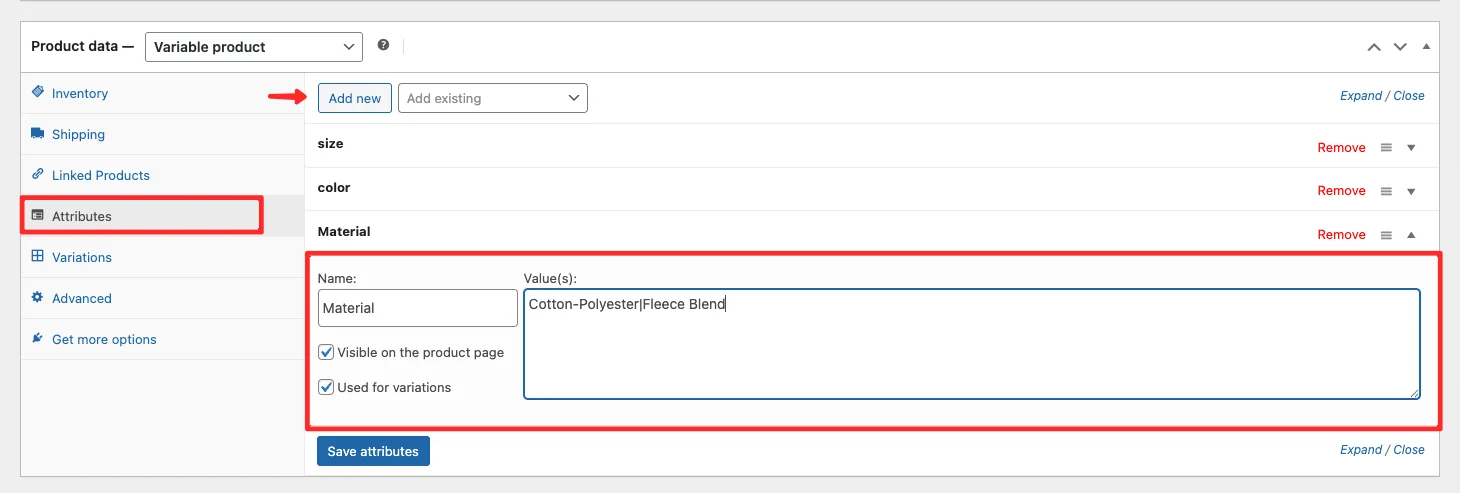
- Click the Attributes tab in the Product data section.
- Use the dropdown to select an existing global attribute, or choose Custom product attribute for a one-off option. Then click Add.
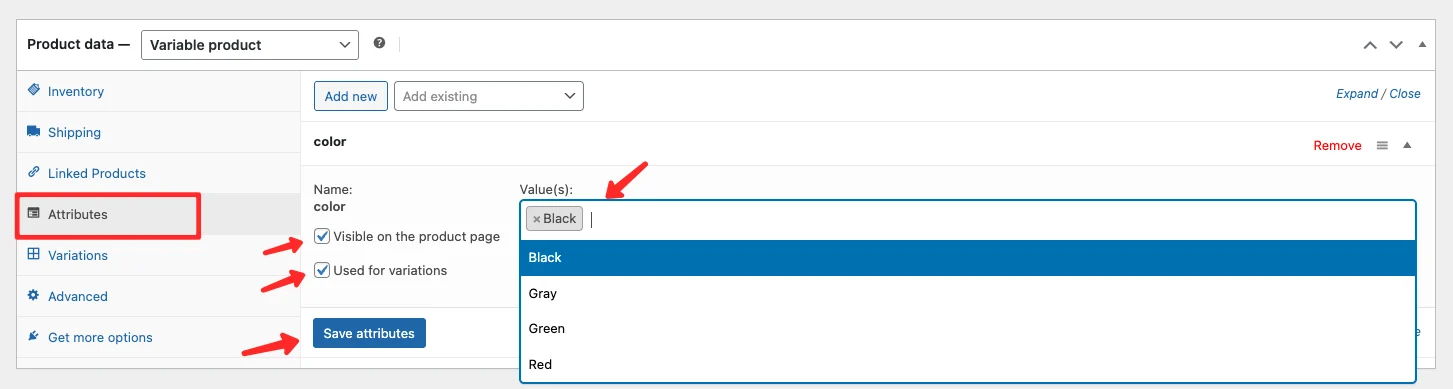
- If using a custom attribute, enter a name (e.g., Color).
- Select or add the values you need (e.g., Red, Green, Blue).
- Check the Used for variations checkbox — this is required for the attribute to appear as a variation selector on the product page.
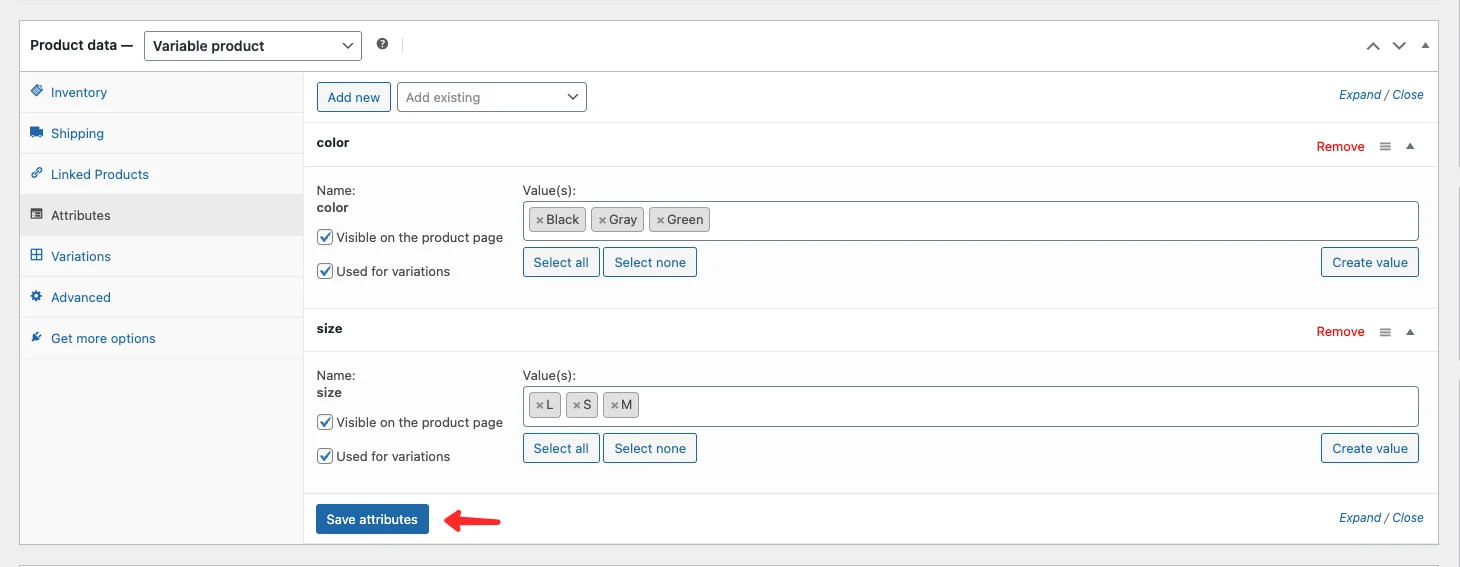
- Repeat for any additional attributes (e.g., Size).
- Click Save attributes when you are done.
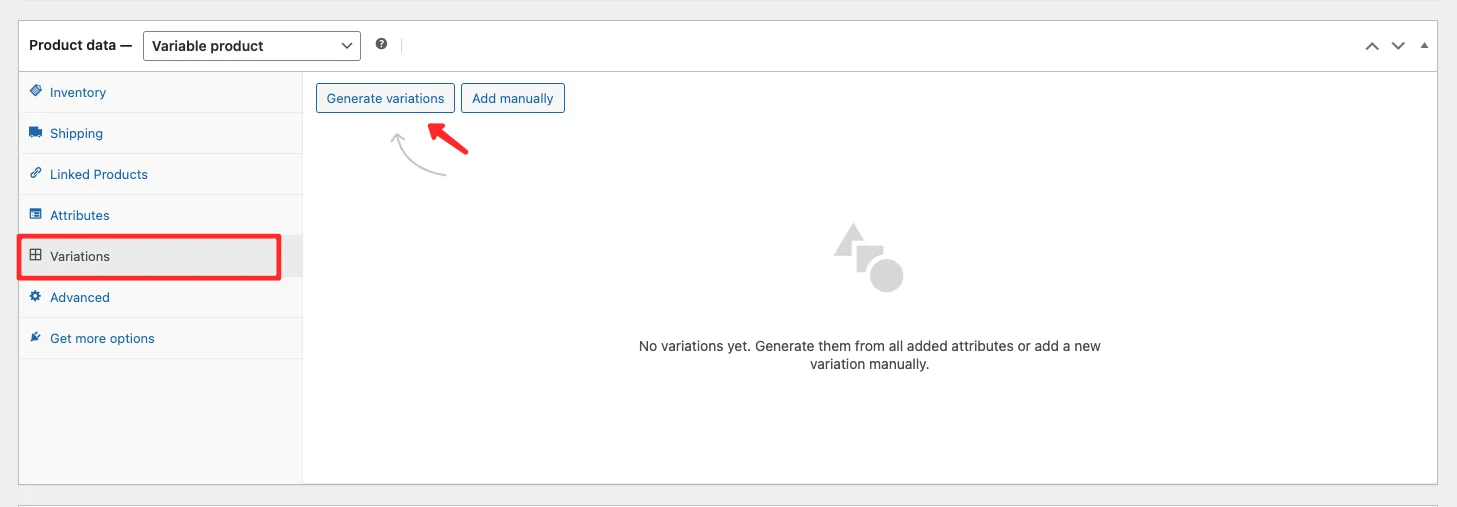
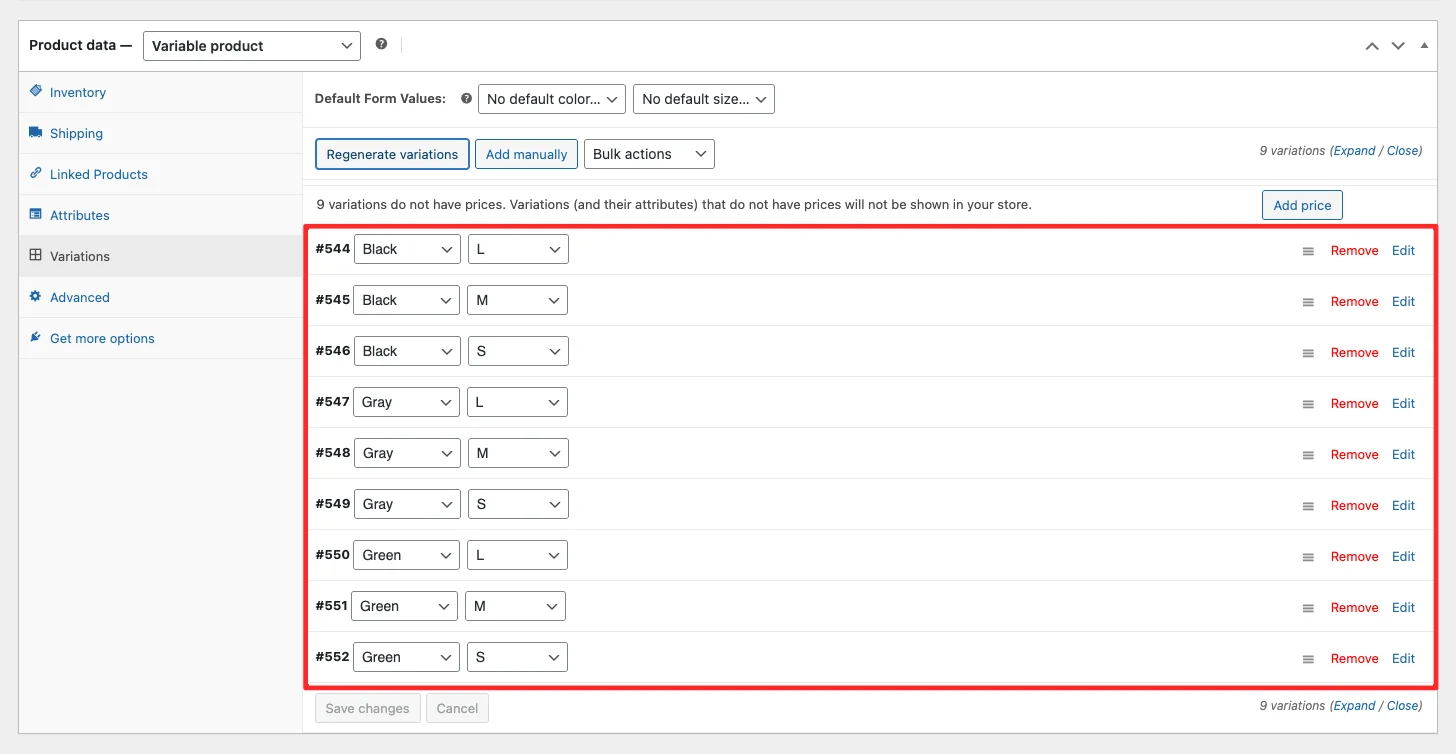
Step 3 — Generate and Configure Variations
Once your attributes are saved, move to the Variations tab.
- From the dropdown, select Create variations from all attributes.
- Click Go. WooCommerce will automatically generate all possible combinations.
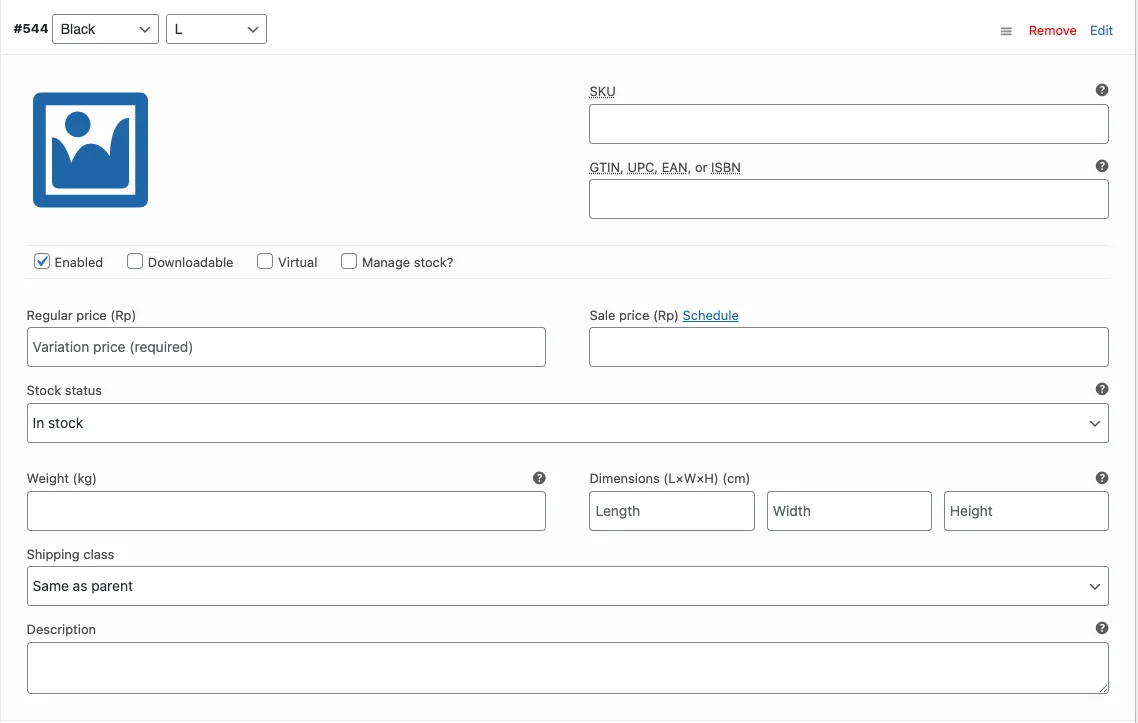
- Click on each variation to expand it.
- Fill in the required details for each variation.
Each variation can have its own:
| Field | Description |
|---|---|
| SKU | A unique product code for this variation |
| Regular Price (required) | The standard selling price |
| Sale Price (optional) | A discounted price when running a promotion |
| Stock quantity | How many units are available |
| Allow backorders | Let customers order even when out of stock |
| Low stock threshold | Get an email alert when stock drops below this number |
| Downloadable files | Attach files if selling a digital product |
| Download limit | Restrict how many times a file can be downloaded |
| Download expiry | Set an expiry date on download access |
| Enabled | Toggle to show or hide a specific variation |
| Virtual | Check this for service or digital products with no shipping |
You can also assign a unique image per variation. This is useful if you sell items in different colors — each variation can display the correct product photo when a customer selects an option.
- Click Save changes after entering all variation data.
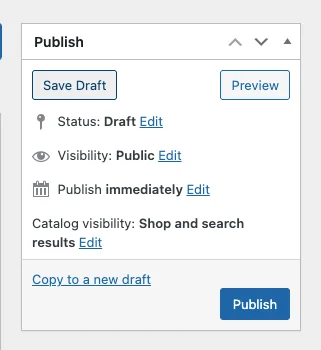
Step 4 — Publish the Product
When all variation data has been filled in, click Publish (or Update if editing an existing product).
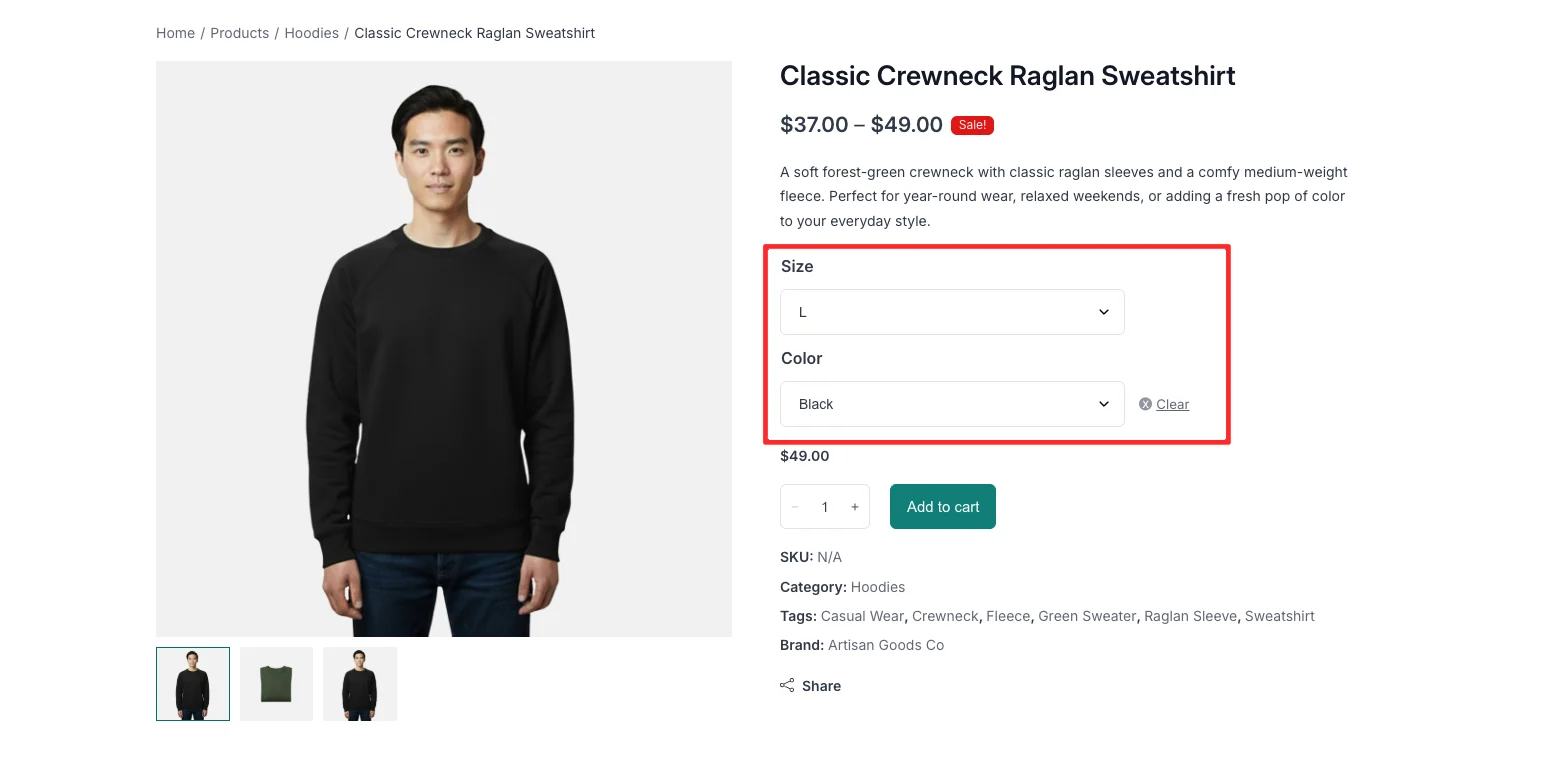
Your product will now display a set of dropdowns or selectors on the product page, letting customers choose exactly what they want before adding to cart.
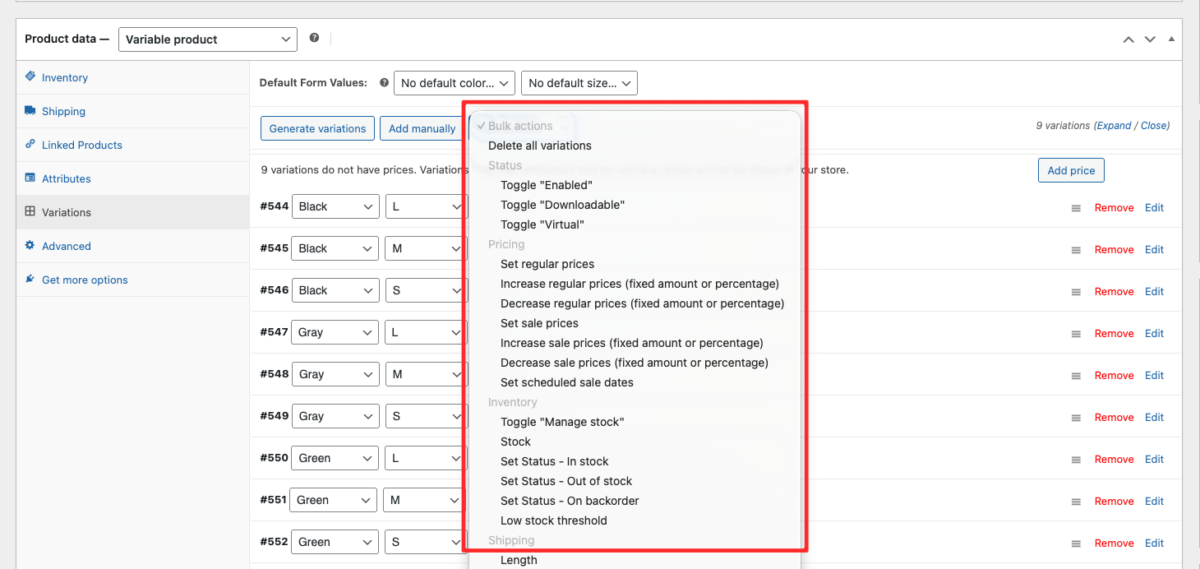
How to Bulk Edit WooCommerce Product Variations
If your product has many variations that share the same price or stock level, entering data one by one would take forever. WooCommerce has a built-in bulk edit feature for variations to handle this quickly.
For example, if you sell 10 color variants of a hoodie and they all cost the same, you can set the price for all variations at once.
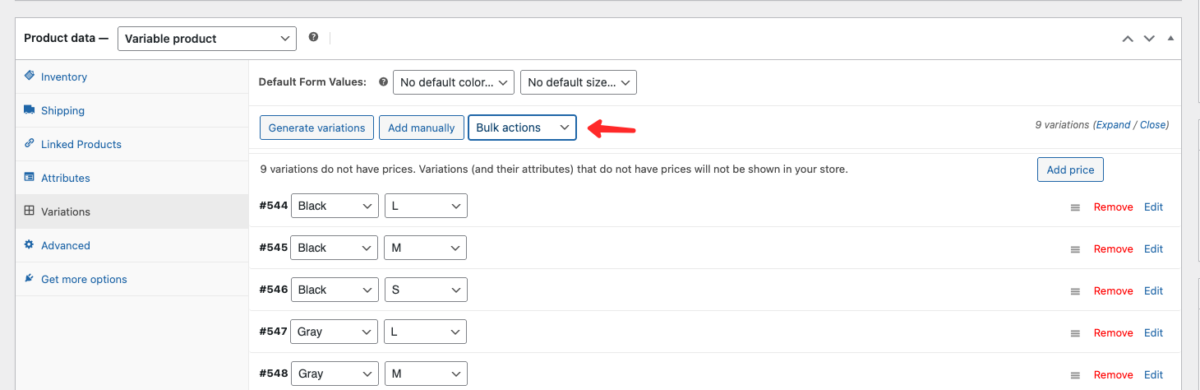
To bulk edit variations:
- On the Variations tab, use the dropdown at the top (below the variation list).
- Select the action you want to apply — such as Set regular prices or Toggle “Enabled”.
- Click Go.
- Enter the value when prompted.
- Click Save changes.
Bulk editing is a significant time-saver once your catalog starts growing.
Best Practices for WooCommerce Variable Products
A few tips to get the most out of product variations:
- Always fill in a price for every variation. WooCommerce will not display a variation without a price, and customers will see an error when trying to select it.
- Use unique SKUs per variation to simplify order fulfillment and inventory tracking.
- Add variation-specific images wherever possible. Showing the exact item a customer is selecting increases purchase confidence.
- Set a default variation under the Variations tab so the product page does not open empty. Pick your most popular option as the default.
- Set up global attributes before adding products if your store sells many similar items. Creating Color and Size once at the store level (Products > Attributes) means you never have to type them again — just select them per product.
Frequently Asked Questions
A variable product lets you offer multiple versions of a single item—such as different sizes (S, M, L) or colors (Blue, Red)—each with its own price, SKU, and stock level.
You can manage this by navigating to Products > Attributes in your dashboard. Add a name for your attribute, then click Configure terms to list your specific choices, like Blue, Red, or Green.
Yes, absolutely. In the Variations tab, you can click on each specific combination to expand it and set a unique price. This is ideal if certain sizes or premium colors cost more to produce.
Adding a unique photo for every variation gives your customers confidence in what they are clicking on. This reduces confusion, leads to fewer customer questions, and directly increases your sales.
Wrapping Up
WooCommerce product variations give you a flexible, organized way to sell products with multiple options — without cluttering your store with dozens of separate listings. Understanding the difference between global and local attributes helps you build a catalog that is easy to manage and filter from the start.
The process comes down to four steps: set the product type to Variable product, add your attributes (global or local), generate and configure each variation, and publish.
Once you have the basics down, bulk editing makes it easy to scale as your product catalog grows.
This guide covers the essentials to get you started. For a more comprehensive reference, the WooCommerce official documentation on variable products goes deeper into advanced configuration options that become useful as your store scales.
Using Kubelio as your WooCommerce theme? Kubelio’s clean product page layout works seamlessly with variable products, displaying variation selectors clearly so customers can make their choice with confidence. Download Kubelio for free and see how it looks in action.

Comments