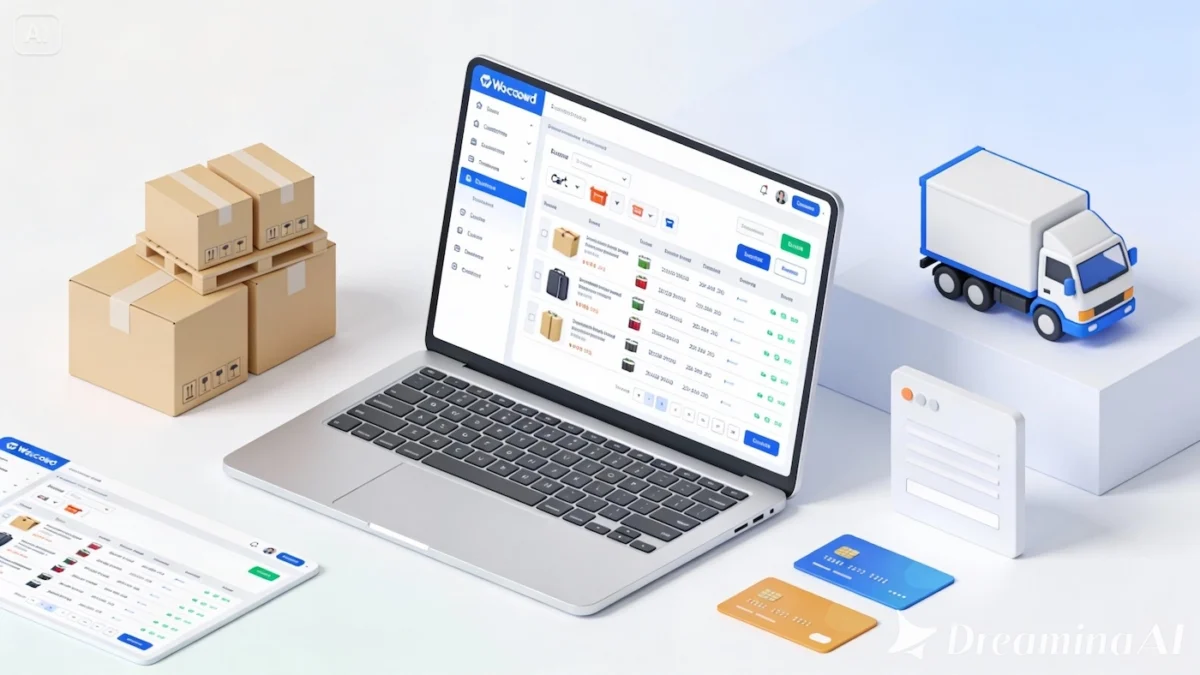
Starting an online business offers great potential, but many beginners struggle with technical challenges that could be avoided early on. One of the most common mistakes is spending too much time adjusting website design instead of focusing on sales strategy and customer acquisition.
WordPress is a powerful platform, but using themes with excessive customization options often leads to unnecessary complexity. Online store owners may spend hours editing layouts and adding features that do not directly contribute to sales. As a result, the core objective of selling products and attracting customers is frequently overlooked.
A more effective approach is choosing a theme that simplifies the process rather than complicates it. Kubelio Theme is built to solve this exact problem. As a free WooCommerce theme, Kubelio offers a simple, minimalist, lightweight, fast, and highly user-friendly design. It removes confusion caused by complex settings and focuses on what truly matters for an online store: performance, usability, and conversions.
Why Use Kubelio WooCommerce Theme
1. Simple and Minimalist Design
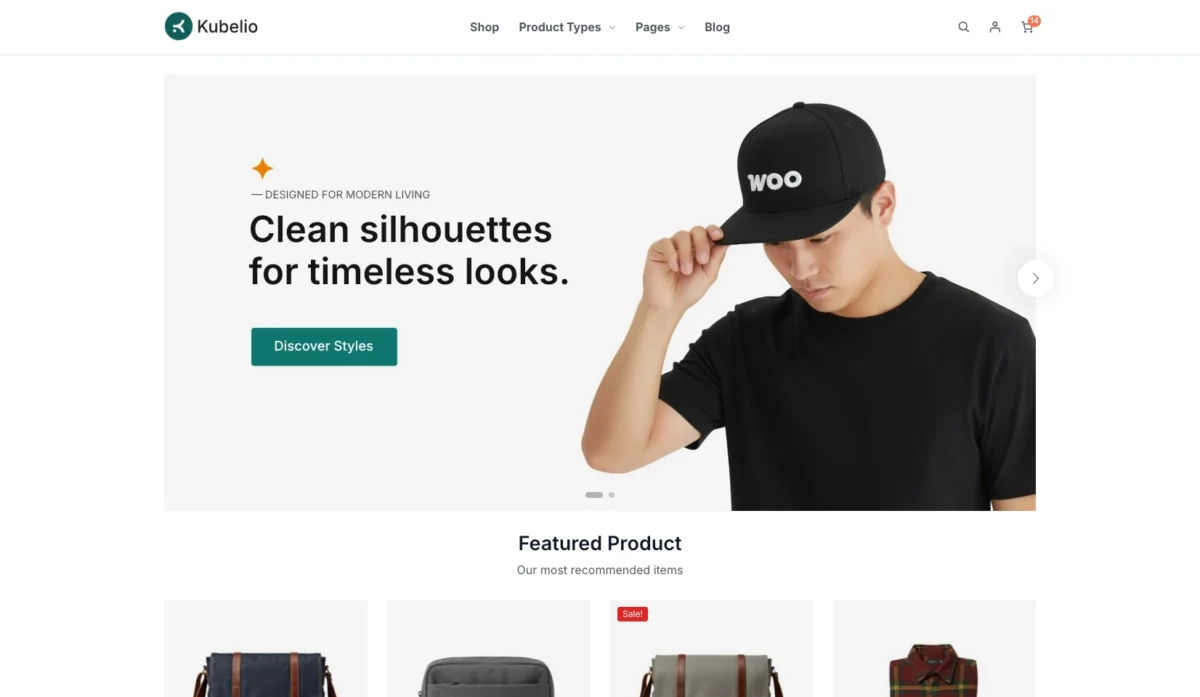
Kubelio prioritizes a clean and modern design with a strong focus on product presentation. There are no unnecessary visual elements that distract visitors from browsing or purchasing products. The homepage is built using the WordPress block editor while remaining lightweight and fast loading, helping maintain optimal website performance.
2. Responsive and Mobile-Friendly Layout
Kubelio is fully responsive and designed to provide a consistent experience across desktop, tablet, and mobile devices. The layout automatically adapts to different screen sizes while maintaining a professional and user-friendly interface. The theme also allows you to upload separate banner images for mobile devices, ensuring promotional content remains clear and effective on smaller screens. This feature is especially important as mobile shopping continues to grow globally.
3. Flexible Custom Blocks
Kubelio includes several custom blocks that simplify homepage management and content layout.
Banner Slider
You can set different banner images for desktop and mobile views, making it easier to highlight promotions or featured products effectively.
Product Block
Products can be displayed based on specific criteria such as newest items, best sellers, categories, or other custom filters. This makes it easy to promote key products and guide visitors toward important offers.
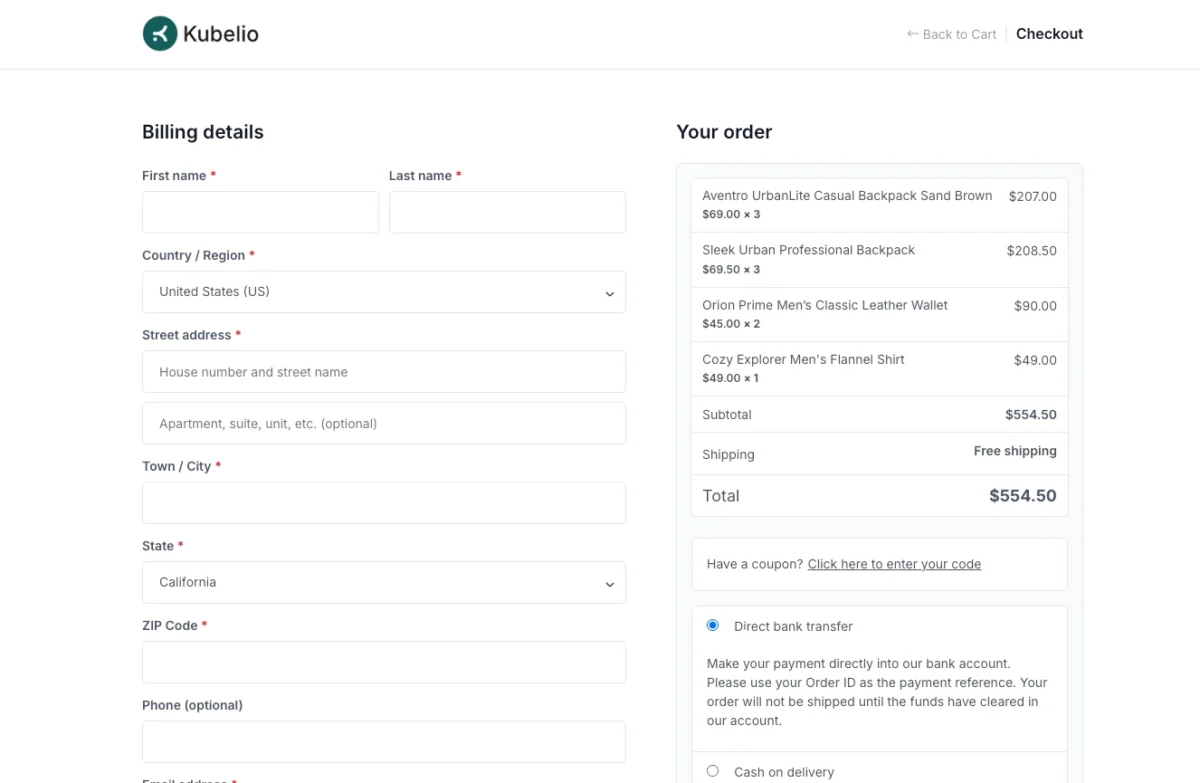
4. Clean Checkout and Cart Experience
The checkout and cart pages are designed with a minimalist approach to reduce distractions and improve conversion rates. Kubelio also includes a mini cart feature that allows customers to review their cart contents without leaving the current page, creating a smoother shopping experience.
5. Easy Customization and Branding
Customizing Kubelio to match your brand identity is straightforward. Through the WordPress Customizer, you can easily adjust primary colors, heading colors, backgrounds, and other visual elements without writing any code. This makes branding accessible even for beginners.
6. Fast Setup and Demo Import
One of Kubelio’s key advantages is its quick and simple setup process. With Theme Wizard integration, users are guided step by step through theme installation, required plugin setup, and demo content import. Once the demo is imported, you only need to replace essential elements such as logos, banners, products, and configure shipping and payment methods. Within minutes, your online store is ready to launch.
Step 1: Install Kubelio Theme
Download the Kubelio theme. After downloading, you’ll get a file named kubelio.zip. Then follow these steps:
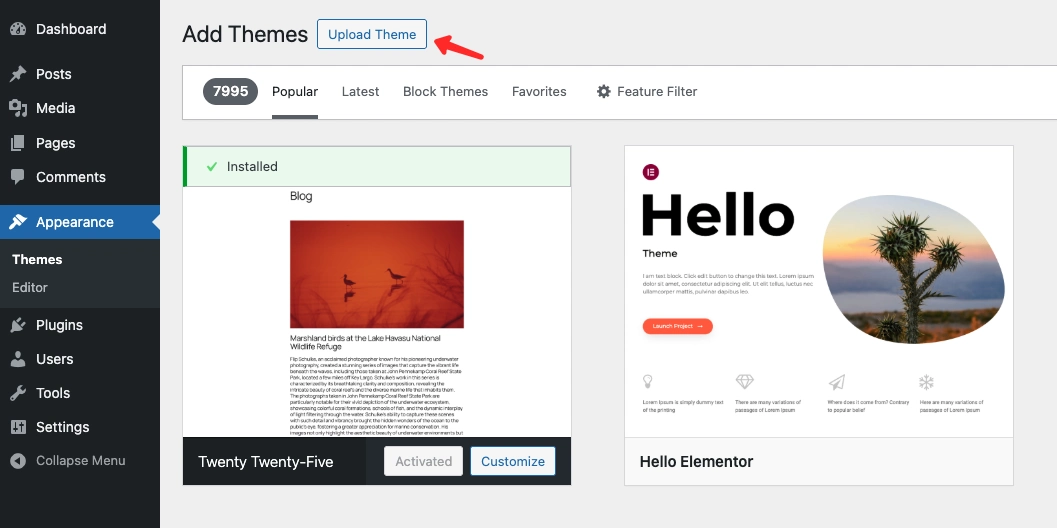
- Go to wp-admin > Appearance > Themes.
- Click the Add Theme button.
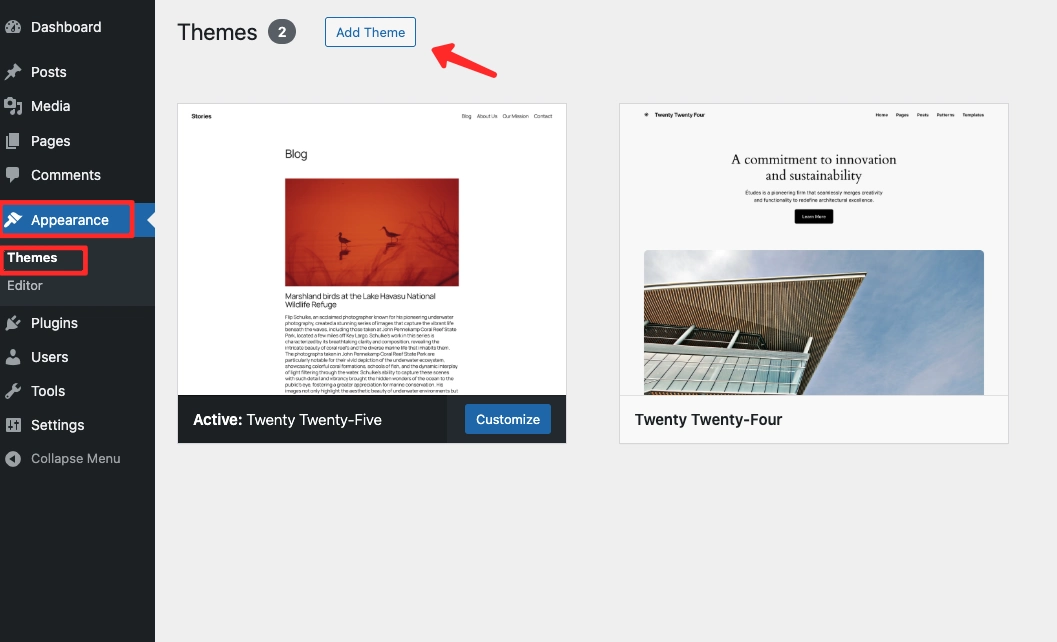
- Select Upload Theme.
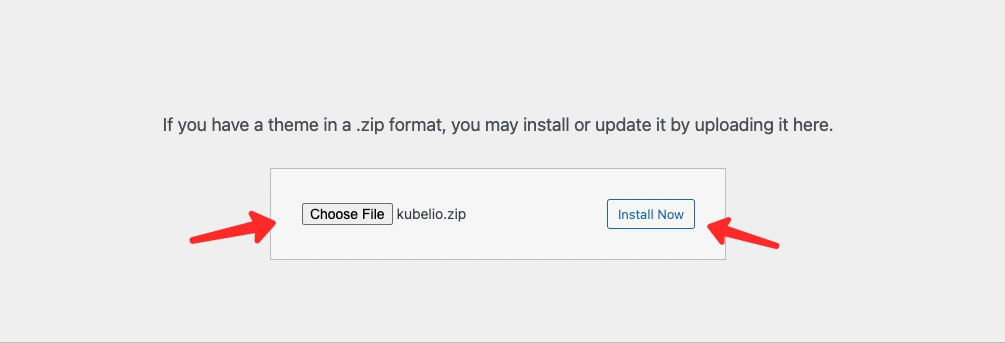
- Click Choose File and locate the downloaded
kubelio.zipfile. - Click Install Now.
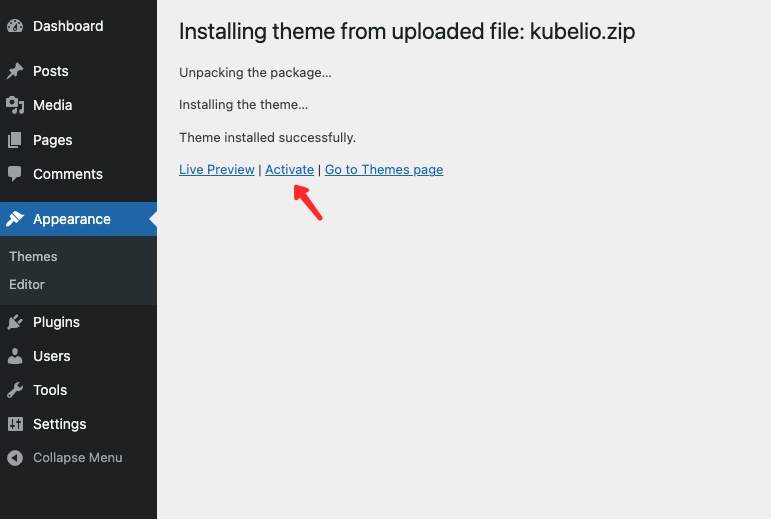
- After installation completes, click Activate to enable the theme on your website.
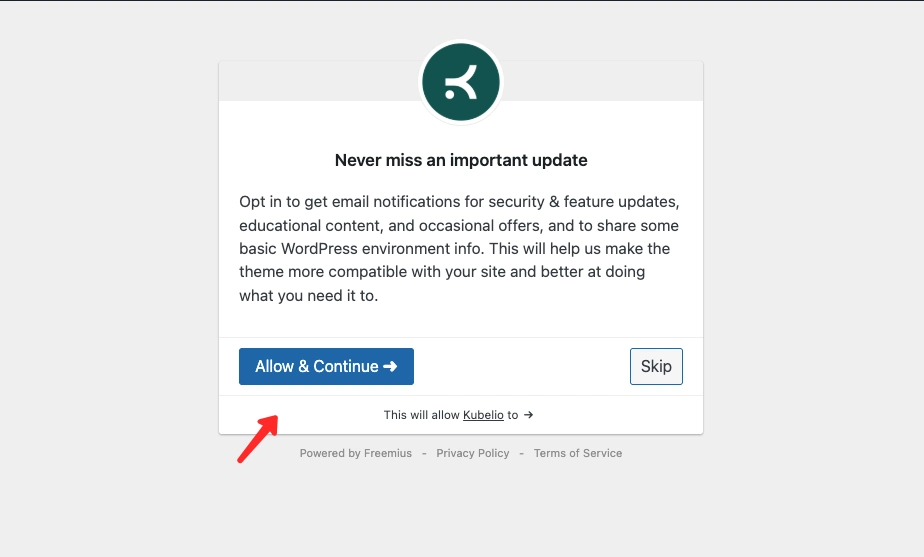
- After activation, you’ll see an Allow & Continue button. Click to allow the theme to receive update information, or choose Skip if you want to bypass this step.
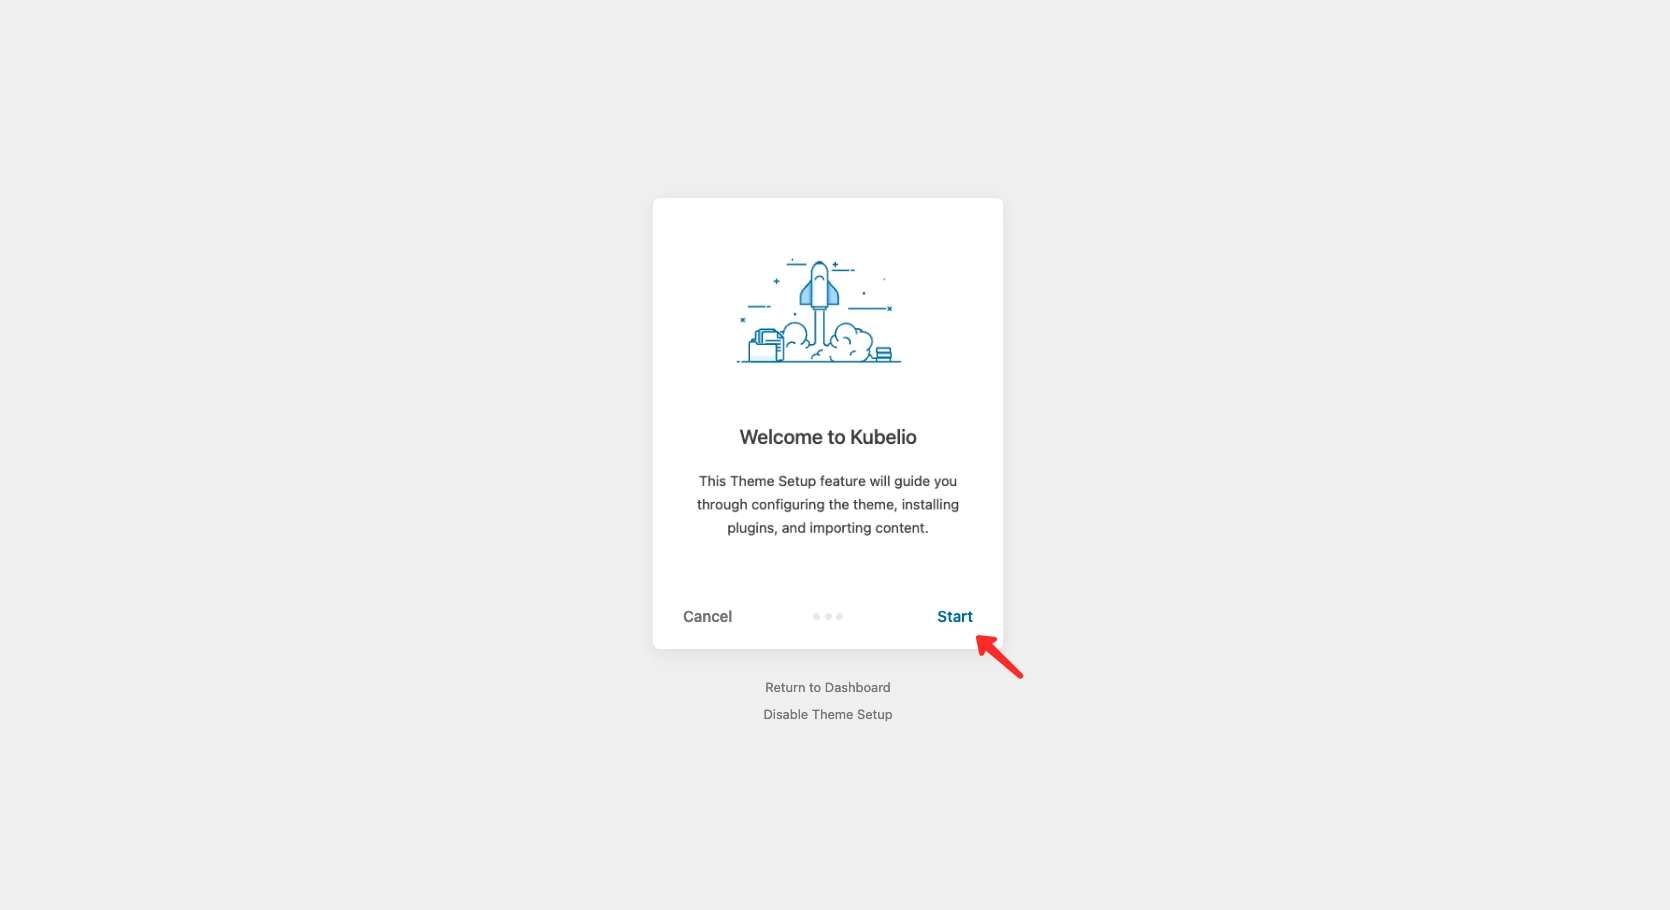
- You’ll be directed to the Setup Theme page.
- Click Start to begin the installation process.
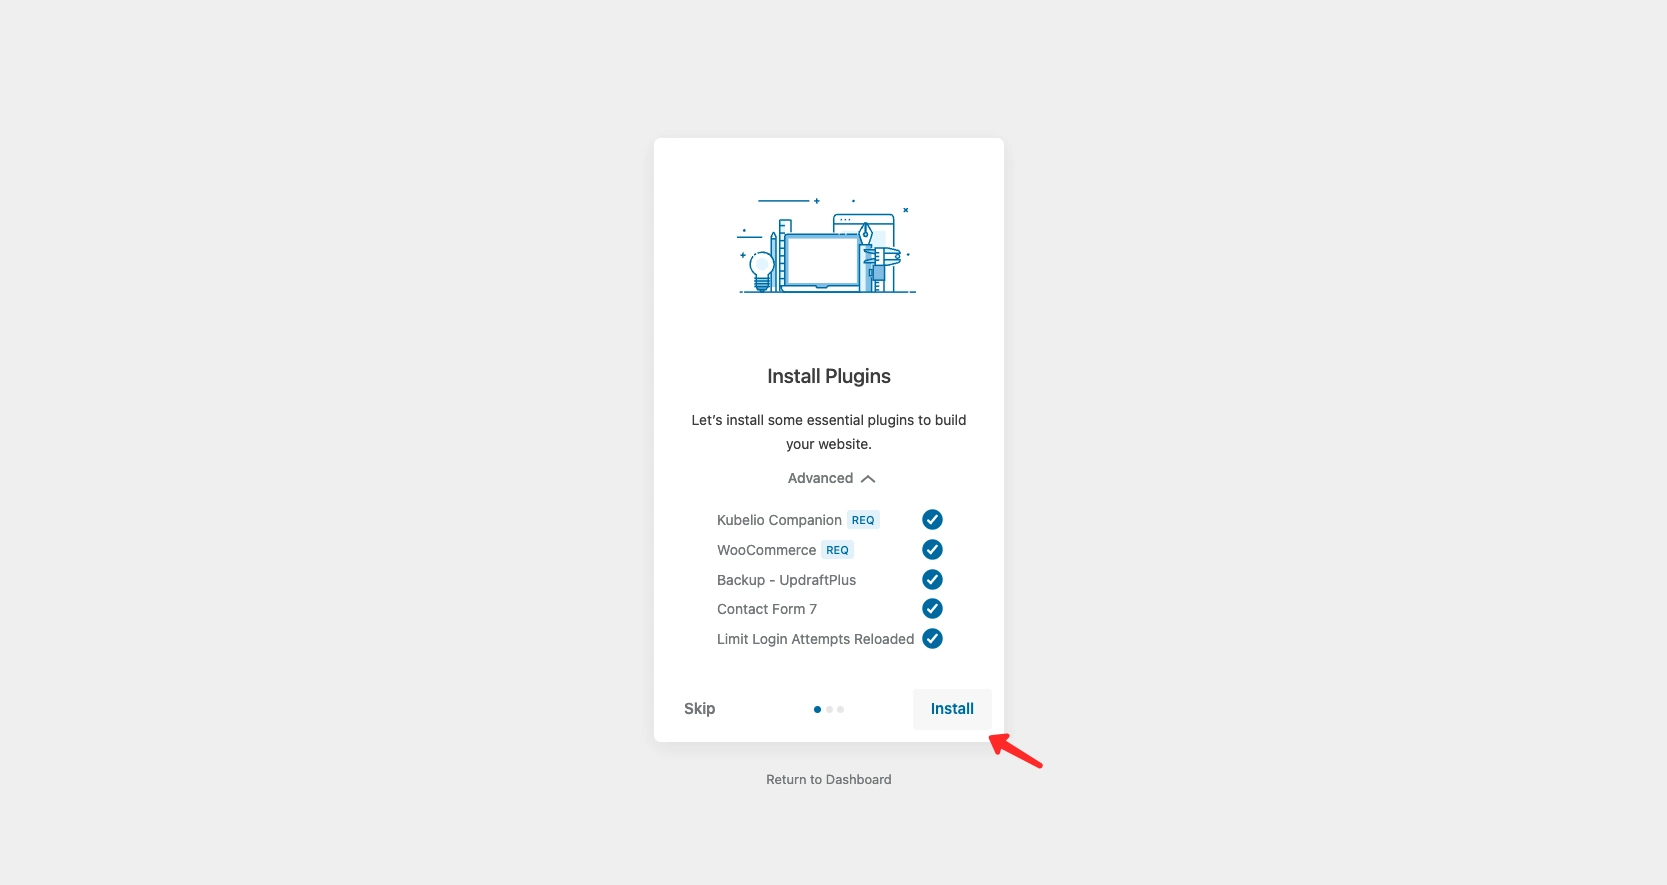
- Click Install to install all recommended plugins (Kubelio Companion and WooCommerce are mandatory).
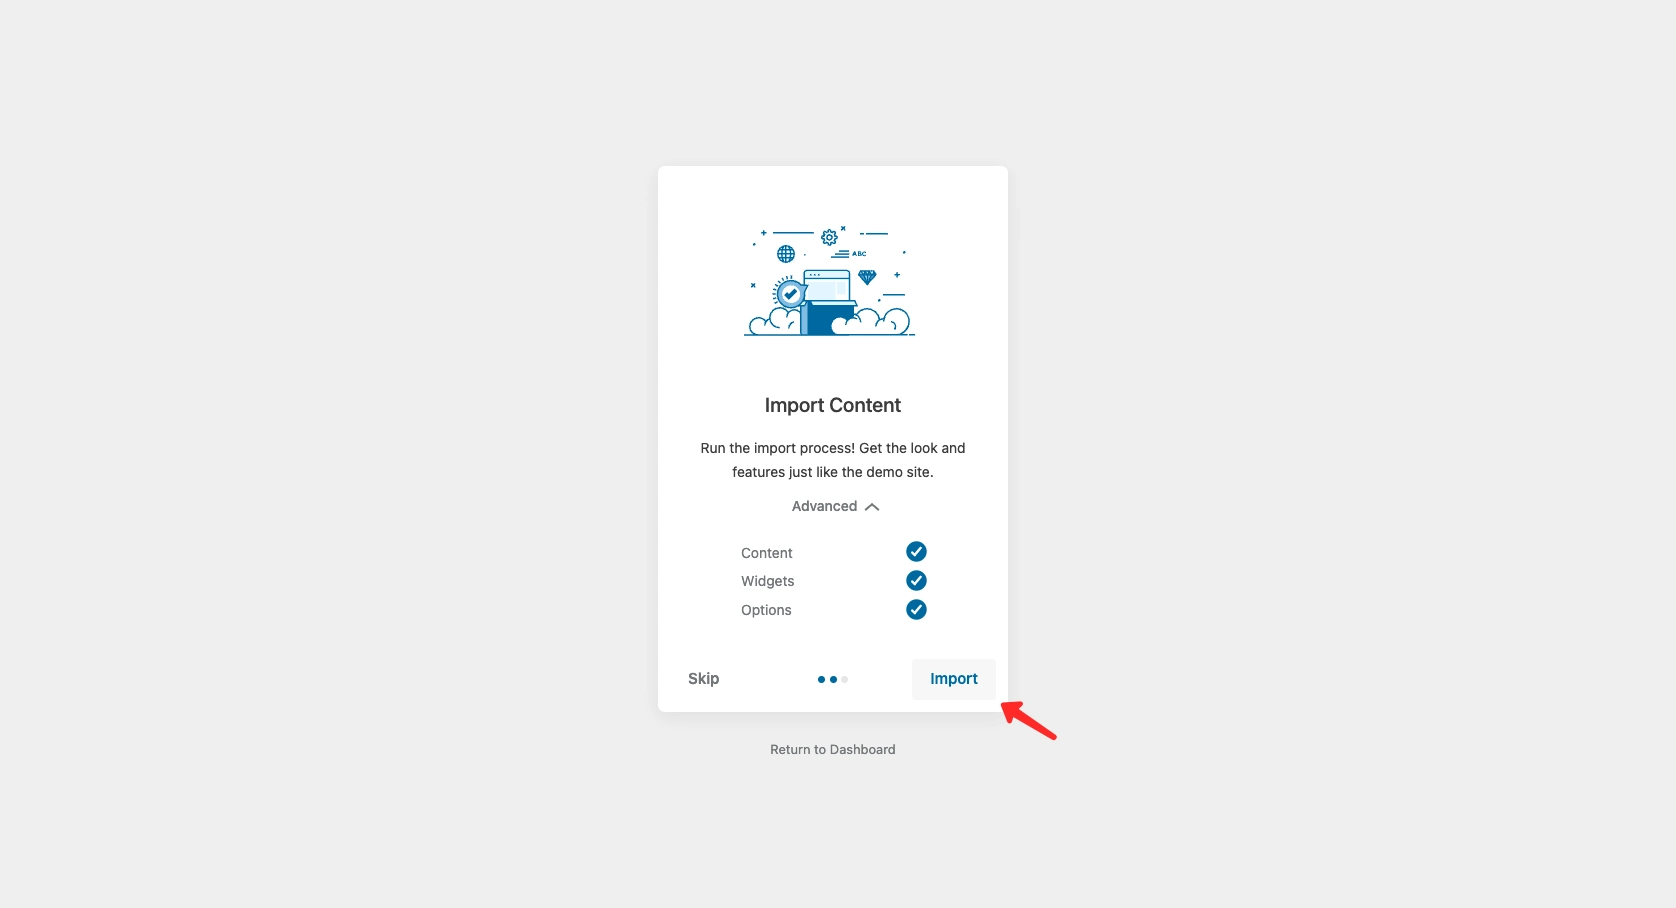
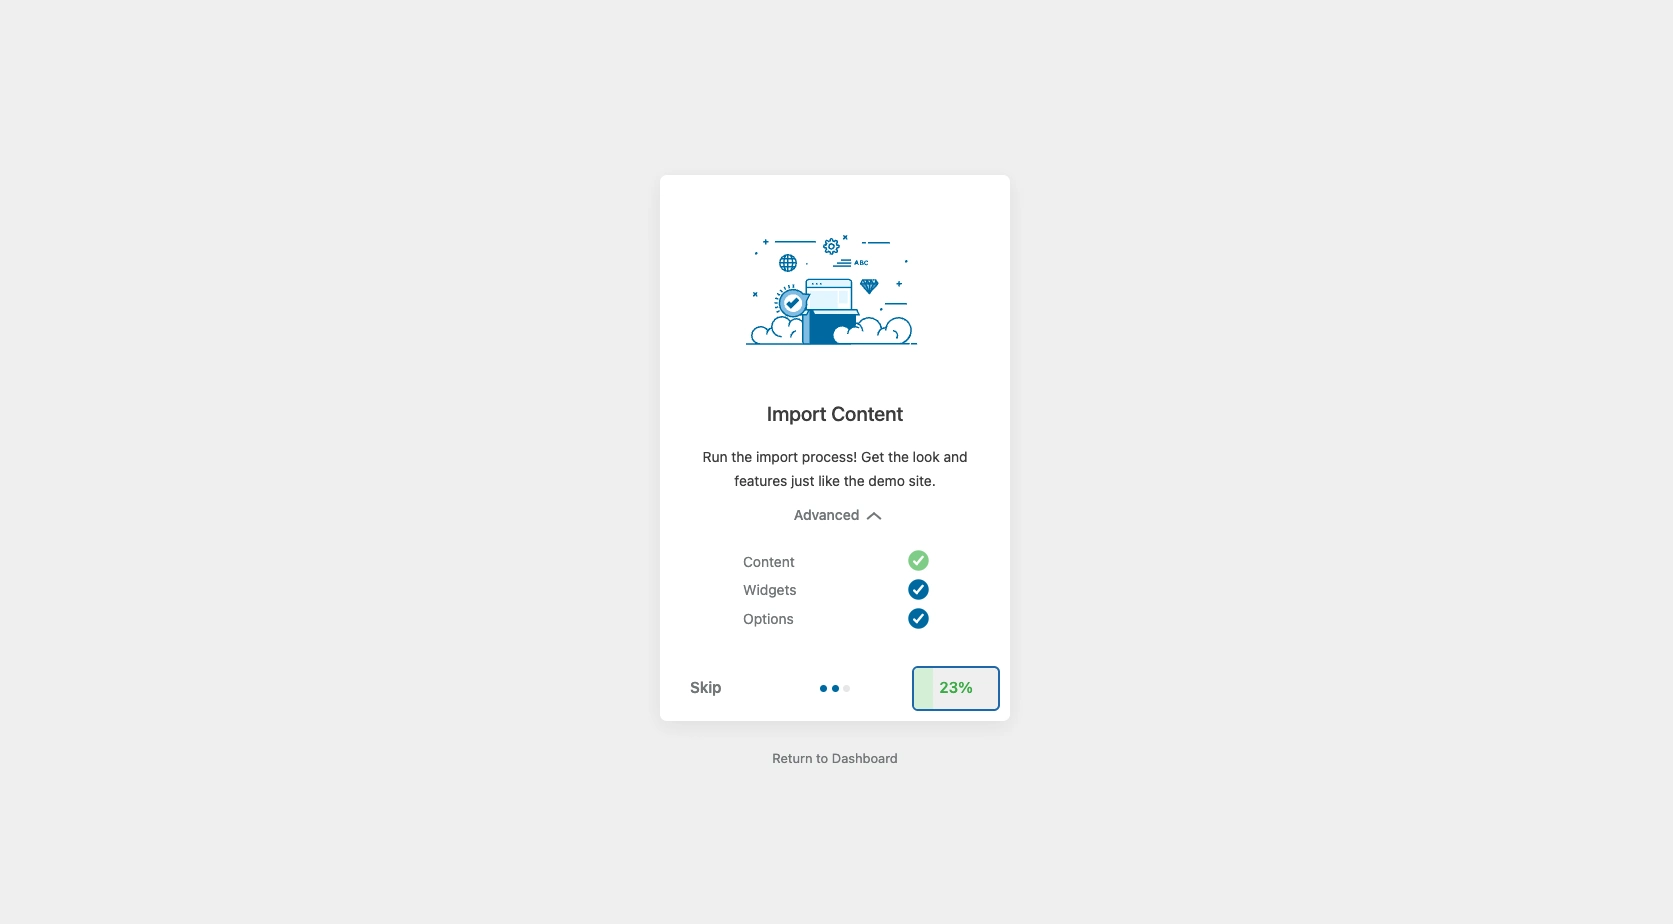
- To get the website appearance like the demo, click the Import button.
This process may take a few minutes depending on your internet speed and server. Please wait until it completes.
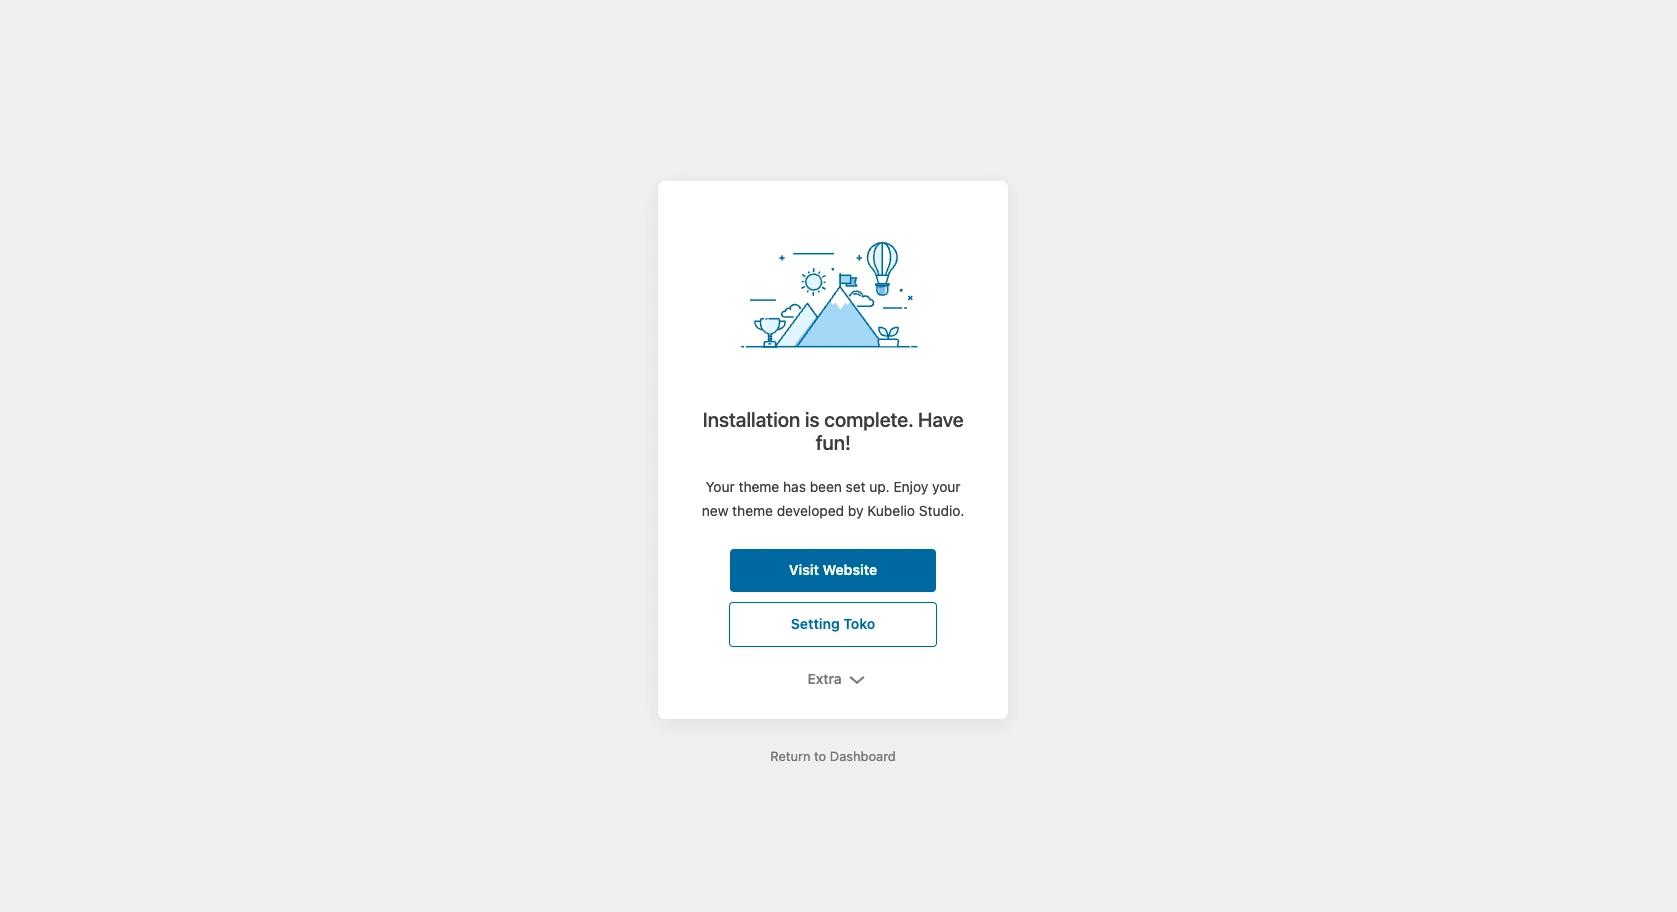
- After all processes complete, click Visit Website to view your website’s initial appearance.
Your website is now ready to be customized further according to your online store needs.
Step 2: Basic Theme Configuration
After the demo import process completes, your website will display a layout and content similar to the Kubelio theme demo version. This appearance serves as an initial example to help you better understand the page structure and elements used.
Changing Logo & Site Identity
Logo and site identity are essential elements for strengthening your online store’s branding. In Kubelio theme, these settings can be easily configured through the WordPress Customizer.
- Go to wp-admin > Appearance > Customize
- Select Site Identity menu
Available Settings:
- Site Icon (Favicon) – Small icon that appears in browser tabs, bookmarks, and mobile shortcuts. Recommended to use 512×512 px size for optimal display across all devices.
- Main Logo – Primary logo displayed in the website header on desktop view.
- Mobile Logo – Dedicated logo for mobile display to ensure better proportions and clarity on small screens.
- Checkout Logo – Logo displayed on checkout page to maintain branding consistency during payment process.
- Color Browser – Option to change address bar color on mobile browsers, typically adjusted to match primary brand color.
Note: If Mobile Logo and Checkout Logo are left empty, the system will automatically use Main Logo as default.
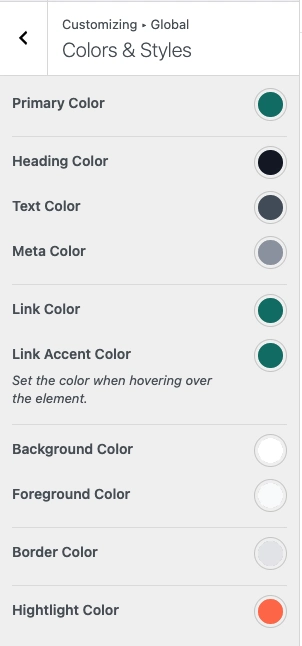
Primary Color Settings
Kubelio theme provides global color settings applied consistently throughout the website. With these settings, you can adjust your online store’s appearance to align with brand identity without changing colors individually on each page.
- Go to wp-admin > Appearance > Customize
- Select Panel Customize > Global > Style & Color
Available Color Settings:
- Primary Color – Main brand color used most frequently, such as on badges, buttons, hover backgrounds, and other highlight elements.
- Heading Color – Used for all headings (H1–H6) and important labels on the website.
- Text Color – Primary text color for content, product descriptions, and general text to ensure comfortable reading.
- Link Color – Default color for all links on the website.
- Link Accent Color – Color that appears when cursor hovers over links.
- Background Color – Website’s primary background color.
- Foreground Color – Used on content areas like cards, boxes, sections, and other surface elements.
- Border Color – Applied to dividing lines, product borders, and dividers.
- Highlight Color – Used for important elements like cart tooltip and other UI highlights.
Changing Banner Slider
Banner slider on the homepage serves as the main visual element to display promotions, featured products, or other important information. In Kubelio theme, banner slider can be edited directly using Block Editor, without additional page builders.
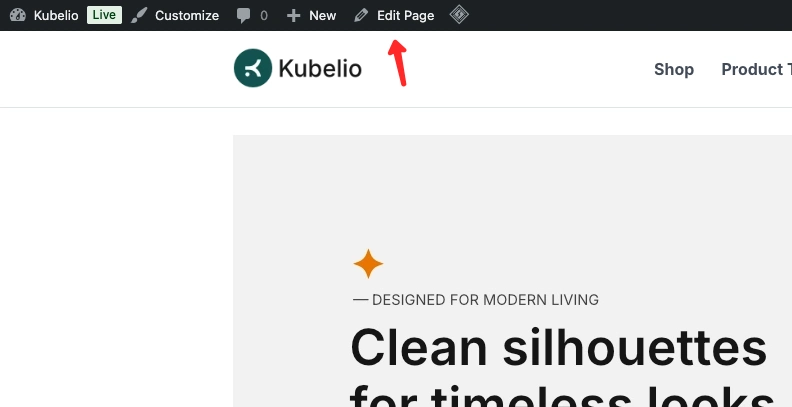
To edit the homepage: Open homepage, click Edit Page.
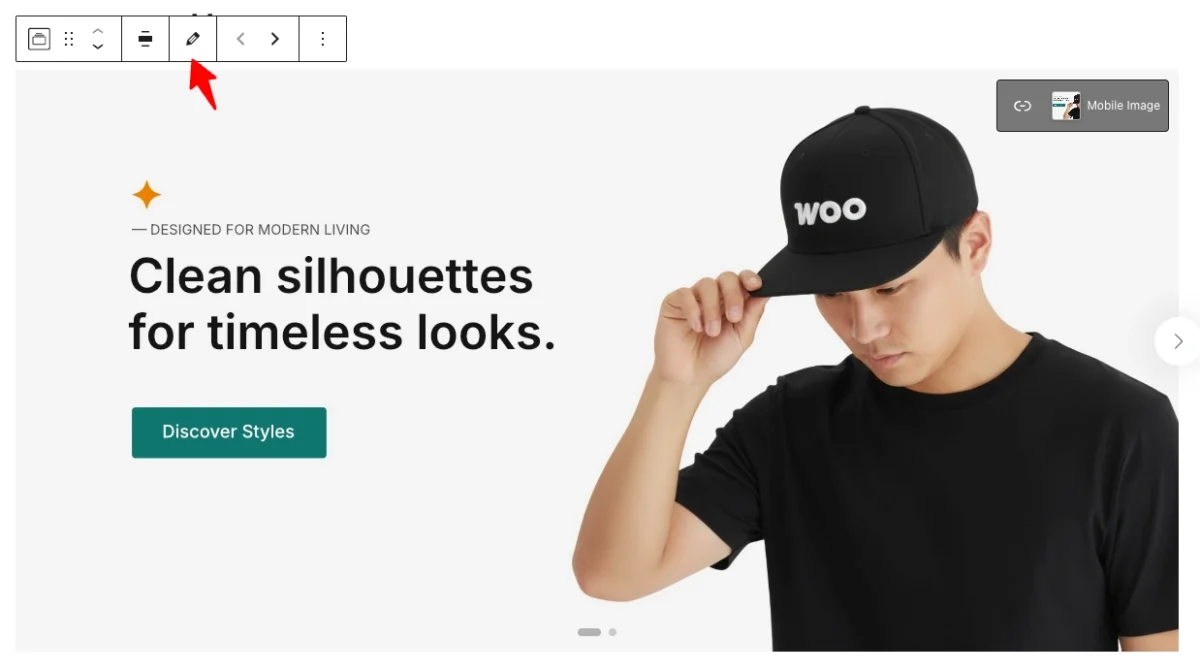
Changing Slider Images
- Select or upload new images according to your promotional needs.
- Click the pencil icon (Edit) on each slider item to replace banner image.
Setting Banner Destination Links
- Click the link icon on each slider image.
- Enter destination URL, for example to product page, category, or specific promo page.

Adding Mobile-Specific Images
- On each slider item, use the Mobile Image option.
- Upload mobile version image to ensure banner display remains optimal on small screens.
Note: If mobile image is not filled, the system will use the main image as default.

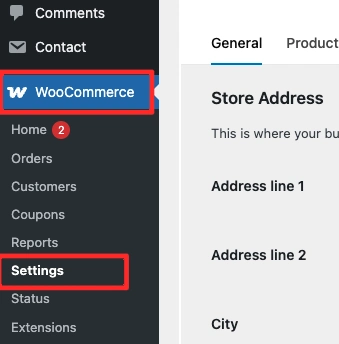
Step 3: Store Settings
After completing basic theme adjustments and homepage, the next step is configuring the store to be ready to accept customers. To do this, navigate to WP-Admin > WooCommerce > Settings.
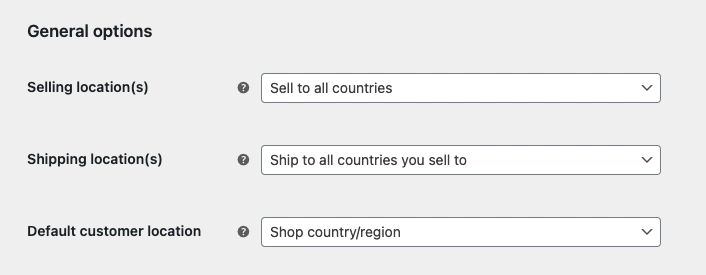
General Options
In the General tab, you’ll configure basic store information.
- Selling location(s) – Select the location or countries where your store will sell products. For example, choose “Sell to all countries” if you want your online store to serve buyers worldwide.
- Shipping location(s) – Determine shipping locations supported by your store. Can be adjusted to available shipping regions.
- Default customer location – Choose default customer location. Usually set to “Geolocate” so addresses are automatically detected based on visitor location.
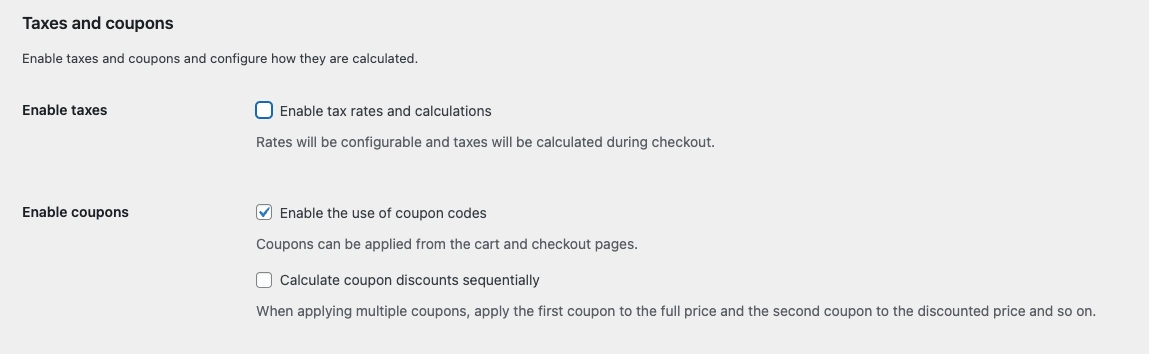
Taxes and Coupons
- Enable taxes – Check this option if you want to automatically calculate taxes on every order.
- Enable coupons – Check to activate discount coupons in your store. Useful for promotions and marketing.
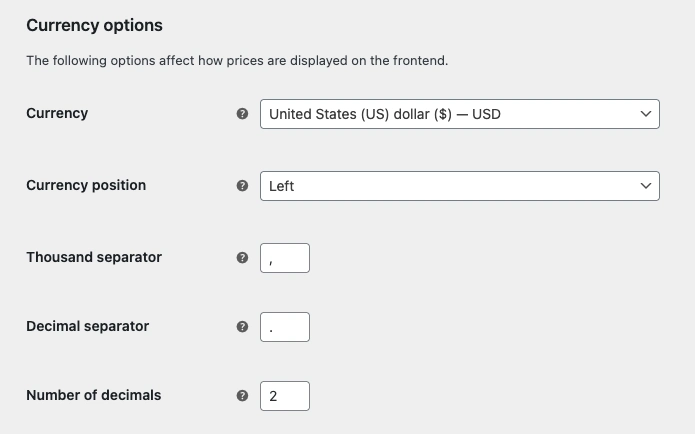
Currency Options
- Currency – Select the currency used by your store, for example IDR (Rupiah) or USD (Dollar).
- Currency position – Determine currency symbol position, for example Left ($100.00) or Right (100.00$).
- Thousand separator – Determine thousand separator symbol, for example comma (,) or period (.).
- Decimal separator – Determine decimal separator symbol, usually comma (,) or period (.) according to local standards.
- Number of decimals – Set number of decimal places displayed on prices, typically 2.
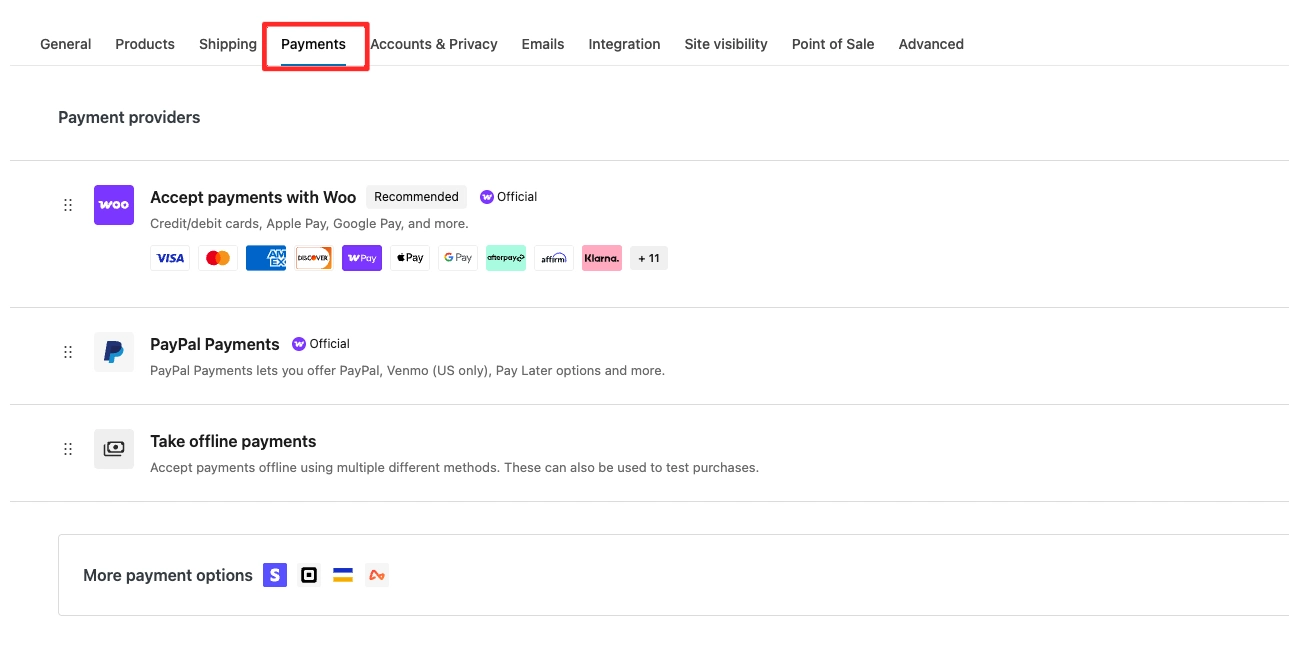
Step 4: Payment Settings
After configuring the store, the next step is setting up payment methods so customers can complete transactions.
- Go to wp-admin > WooCommerce > Settings.
- Click the Payments tab (or Payment Gateways).
Here you’ll find a list of available Payment Providers, such as:
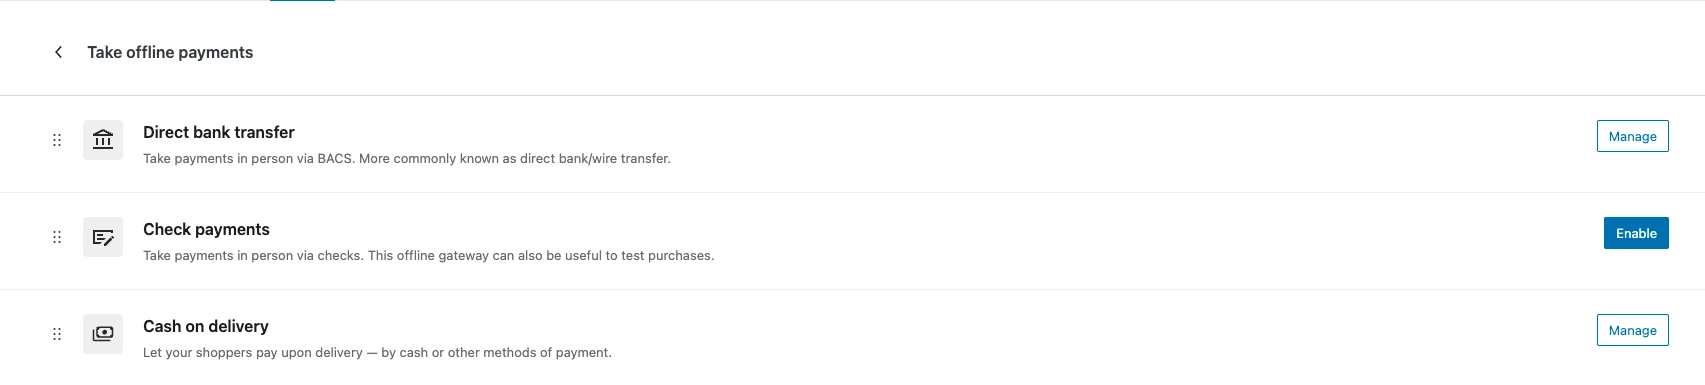
- Direct Bank Transfer
- Cheque Payments
- Cash on Delivery
- PayPal or other payment gateways according to installed plugins.
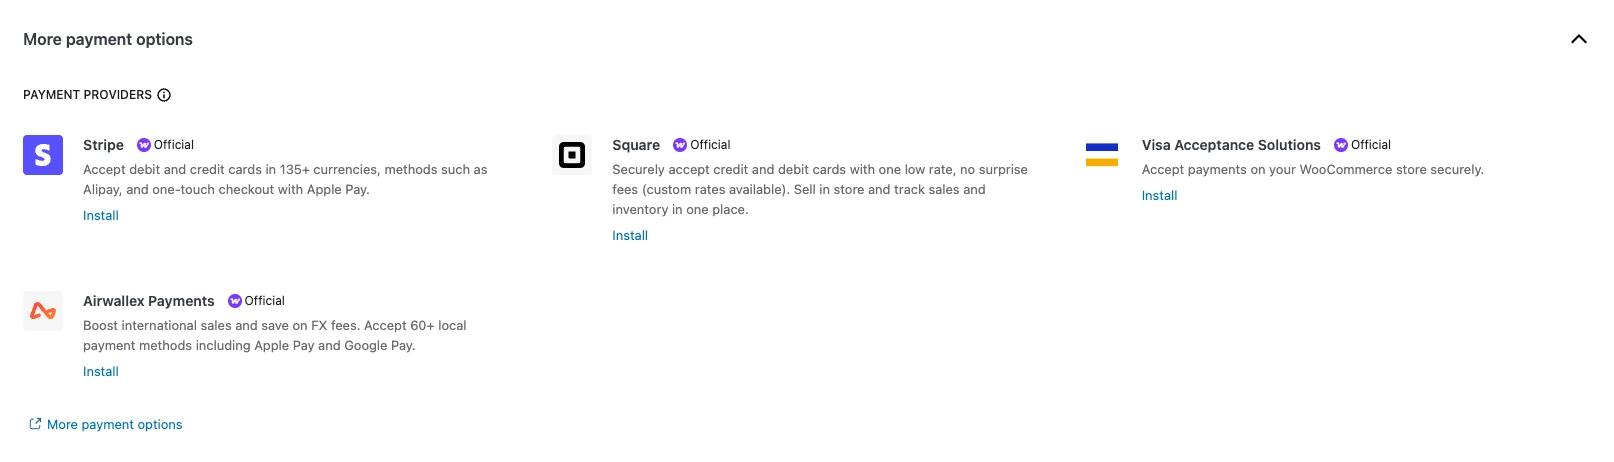
How to Configure Payment Providers:
- Enable desired payment method by clicking Enable.
- Click Set up or Manage to add details, for example:
- For Bank Transfer, enter bank name, account number, and payment instructions.
- For PayPal, enter email address and API credentials according to your PayPal account.
- Save settings when finished.
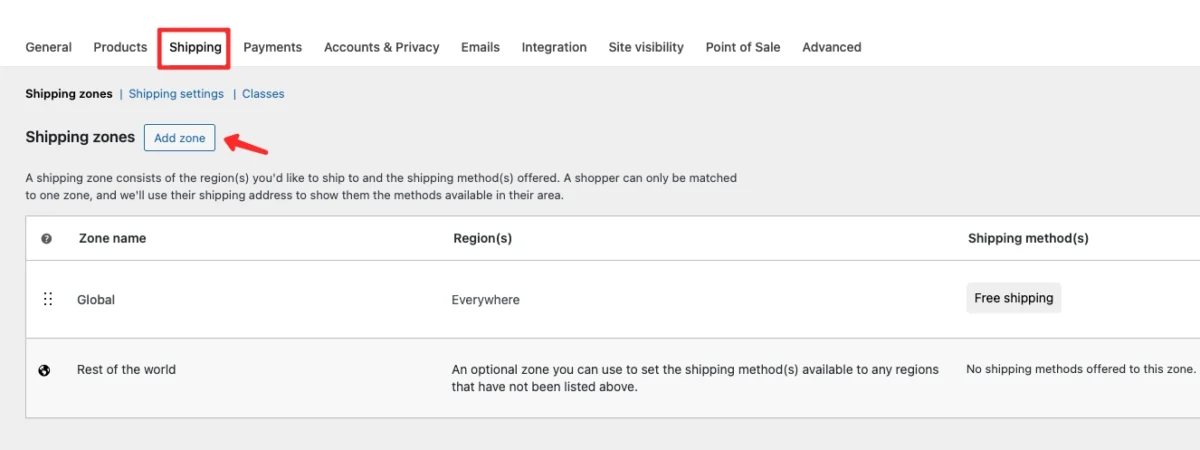
Step 5: Shipping Settings
After configuring the store and payment methods, the next step is setting up product shipping. Shipping settings are important so costs and shipping methods are clear to customers.
To configure settings, navigate to wp-admin > WooCommerce > Settings.
Then click the Shipping tab.
Creating Shipping Zones
Shipping Zone is a shipping region with different rules and rates. For example, shipping costs for New York could differ from California.
Steps to create Shipping Zone:
- Click Add Zone.
- Enter:
- Zone Name – Region name, for example “New York & Surrounding Areas”.
- Region(s) – Select regions/cities/countries included in this zone.
- After that, click Add Shipping Method to determine shipping type.

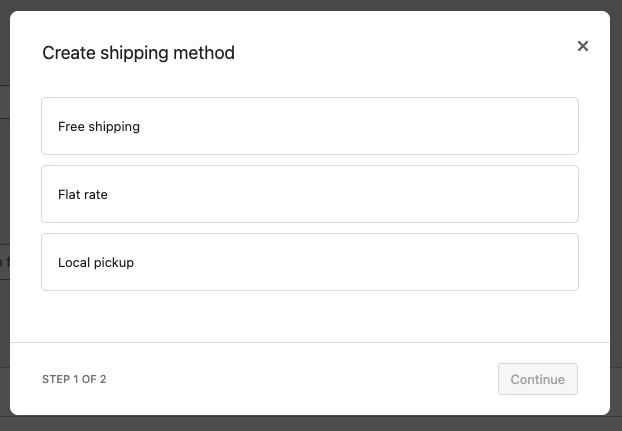
Adding Shipping Methods
WooCommerce provides several default shipping methods:
- Flat rate – Fixed cost per order or per product. Example: $5.00 per shipping package.
- Free shipping – Free shipping. Usually can be triggered if total purchase reaches a certain minimum.
- Local pickup – Customers can pick up orders themselves at physical store.
Select one method, then click Edit to add details:
- For Flat Rate, enter shipping cost and description.
- For Free Shipping, set minimum order requirements or coupons.
- For Local Pickup, can add pickup location notes.
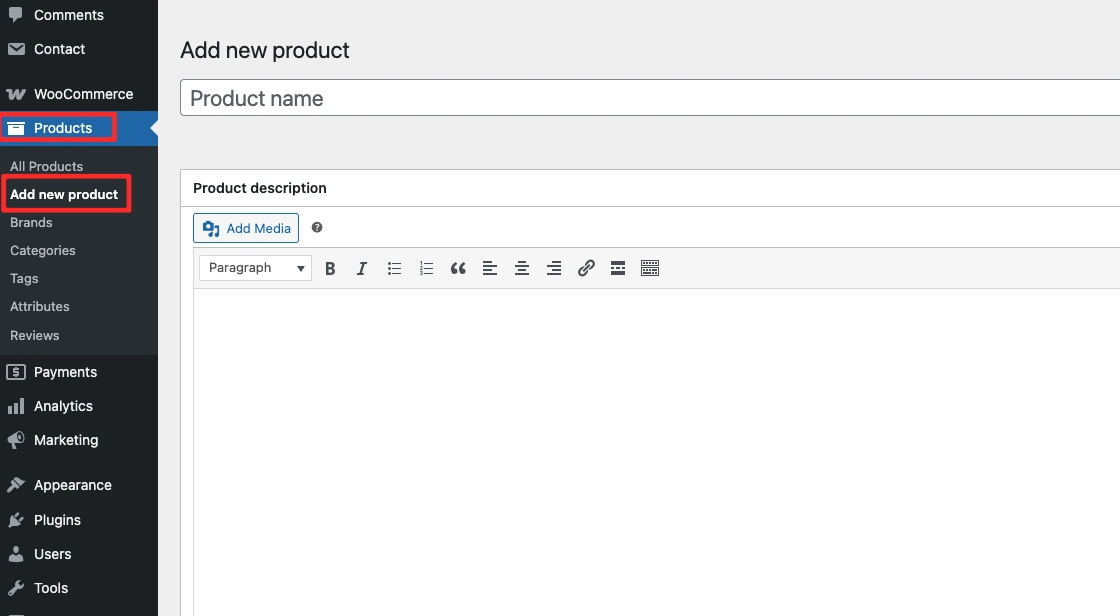
Step 6: Add Products
After the website appearance is ready, the next step is adding products to sell. WooCommerce provides an easy-to-use interface for managing products, from title, description, price, to product images.
To add a new product, follow these steps:
- Go to WordPress Dashboard.
- Navigate to Products > Add New Product.
On this page, you can fill in product details such as:
- Product Name – Product name that will be displayed in the store.
- Product Description – Complete product description explaining features, benefits, and specifications.
- Product Data – Set price, product type, stock, and shipping.
- Product Image – Main product image displayed on product detail page.
- Product Gallery – Several additional images to display product from various angles.
Make sure product information is written clearly and attractively so potential buyers can easily understand the products you offer.
For a more detailed guide on how to input products in WooCommerce: How to Add Products in WooCommerce.
Step 7: Testing
Before the e-commerce website is used publicly, it’s crucial to conduct thorough testing. This stage aims to ensure all features work properly and provide the best experience for customers.
- Test display on desktop, tablet, and mobile to ensure website is responsive.
- Test purchase process & checkout, from add to cart to order completion.
- Check email notifications, ensure order emails are sent to customers and admin.
If emails aren’t being sent, use an SMTP plugin for more stable email delivery.
Tips & Best Practices
To ensure your e-commerce website runs optimally, fast, and stable, implement these best practices:
- Optimize images before upload for faster website loading. Use services like TinyPNG for image compression. Avoid optimizing directly on hosting as it can burden the server and quickly fill hard disk space.
- For main images, ensure image size is < 300KB so they can be shared on WhatsApp.
- Enable automatic backups using UpdraftPlus plugin to secure website data. Set regular backup schedules and connect storage to Google Drive to keep data safe if errors or server issues occur.
- Install SEO plugin like Yoast SEO or Rank Math so products and store pages are easier to find on search engines.
- Use security plugin to protect website from spam and malicious attacks. Recommend using All In One Security because its features are comprehensive, lightweight, and easy to configure.
Conclusion
Building a successful online store is not just about design, but about focusing on products, customers, and sales strategy. Kubelio Theme helps simplify the technical side so you can spend more time growing your business.
By following this guide, you have set up your store, customized the branding, configured payments and shipping, and added products. Your WooCommerce store is now ready to accept customers.
Focus on marketing, SEO, and customer experience. Start selling first and continue improving your store as your business grows. If you need help, refer to the official Kubelio documentation or contact the support team.
Comments